Setting up auto print will help streamline your team's ability to print paperwork efficiently.
Modern Mobile Floor App: How to Set Up Auto Print
What is Auto Print?
The Infoplus Auto Print feature can be used in the Modern Mobile Floor Apps to configure custom workflows to give you automatic printing or one-click access to documents associated with your reports in Infoplus.
Infplus already automatically prints some documents such as Parcel Labels, which is set up via a different process that you can learn how to do here.
What Does Auto Print Do?
Auto Print lets you determine if there are any documents that should always be automatically printed during a process ran in Infoplus. It also allows you to easily access and view any associated documents.
With Auto Print, you will need to do a one-time setup for each workflow (eg: ASN, ship station, pack station, location inquiry) and then the desired documents will either always automatically print or be available to view on the Mobile Apps screen.
Pro Tip: Auto Print is tied to your browser/device, NOT your user credentials. This means If you share a device (computer, laptop, scanner, etc) with co-workers, the auto print settings configured will apply to anyone who logs in on that device.
Why Use Auto Print?
The Auto Print feature gives Infoplus users more customization options for what documents they want to be printed throughout each custom workflow.
Auto Print also saves you manual steps by automating a process. If you set up a document to print every time a specific action is run (eg: packing slip for every order), there is less room for losing the packing slip or misplacing it with the Auto Print feature.
Pro Tip: Auto Print only works in the Modern Mobile Floor Apps. You cannot access the Auto Print feature from the Classic Mobile Floor App or from the desktop version of Infoplus.
How to Set Up an Auto Print Workflow
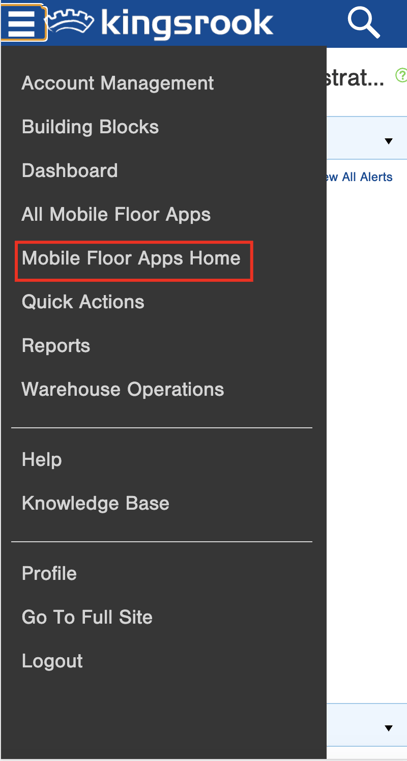
1. Navigate to the Modern Mobile Apps
2. Set up your available printers
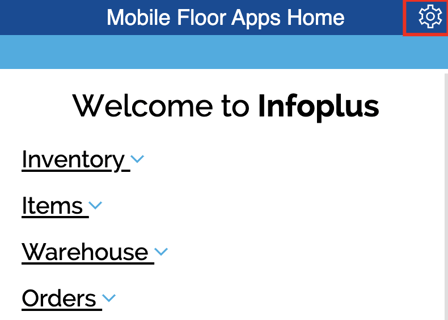
- Click on the Gear Icon in the top right of the Modern Mobile App homepage
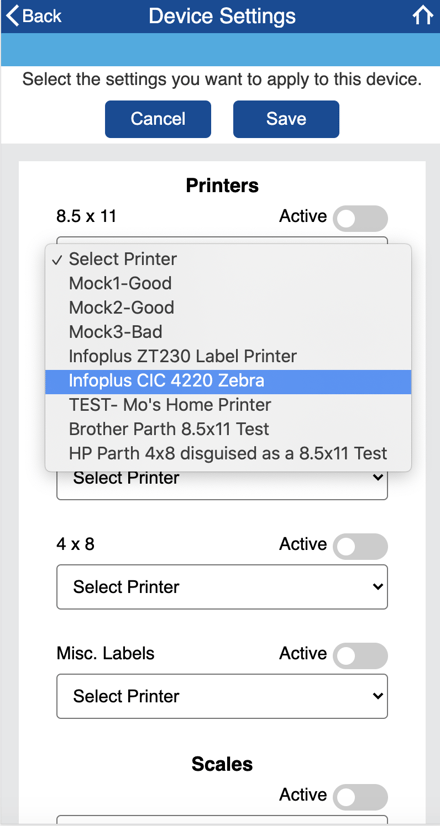
- For each size document you have, select the printer that size document should go to
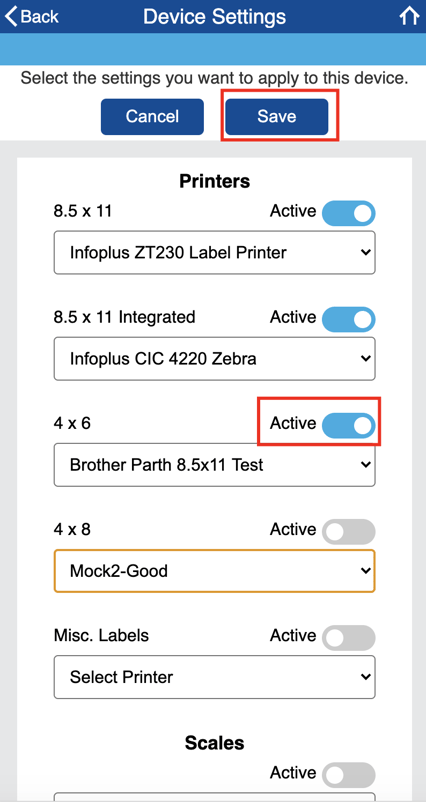
- Activate each printer you want to be utilized for any Auto Print workflow by toggling the Active button so turns blue
- Click Save at the top of the page
- For more detailed information on setting up available printers, see this KB article.
3. Determine which process in Infoplus you want to set up Auto Printing for
- Anywhere that a record/process has any Warehouse Documents, Barcode Templates or Smart Document Templates can utilize the Auto Print feature
- Examples: Receiving, Ship Station, Pack Station, Location Inquiry, etc.
4. Using the Receiving App as an example:
- Go to Inventory>Receiving>Enter ASN Number
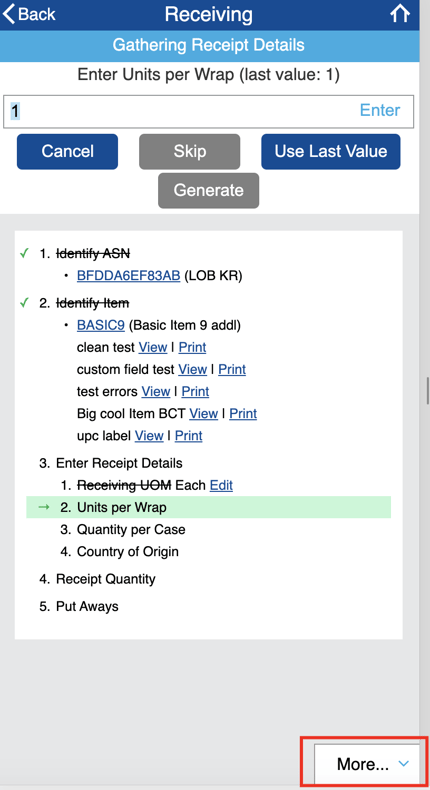
- Once you are on the Receiving page, you can click the "More" button
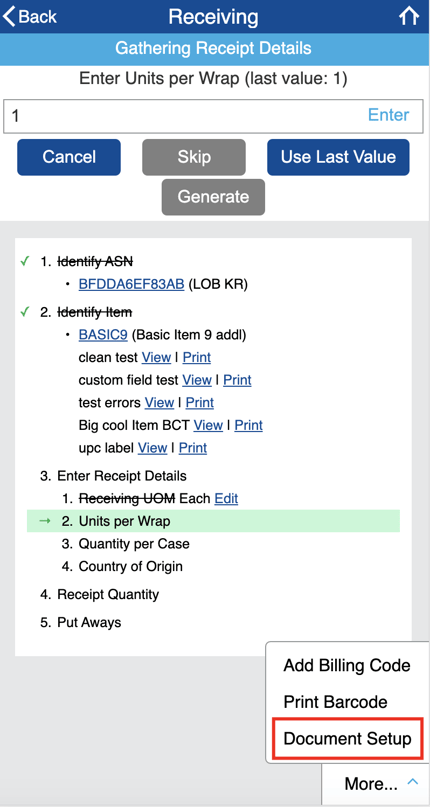
- Then, click "Document Setup"
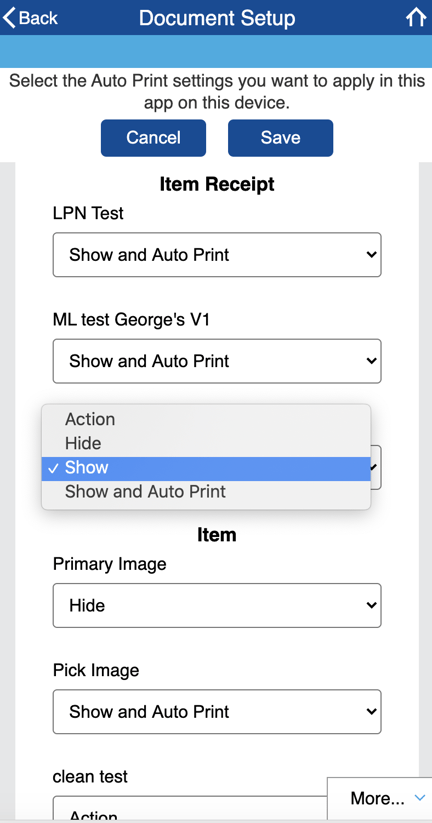
- In the Document Setup page, you will see all possible records that can be printed/viewed for the Receiving workflow
5. Select an option from the drop-down menu for each available document (this will apply every time you run Receiving on this device and only needs to be set up one time per device)
- Hide = do not show or print this document
- Show = show a link to this document on the screen, but do not automatically print it -- you can click the link provided to have documents in the "show" option printed at any time, but it is not automatically printed
- Show and Auto Print = show me this document on my screen and Automatically Print it to the printer selected on the Device Settings page earlier
6. This process is now set up for Receiving in the Mobile Floor App and will always occur when any Receiving process is ran on the device you used to set up the workflow
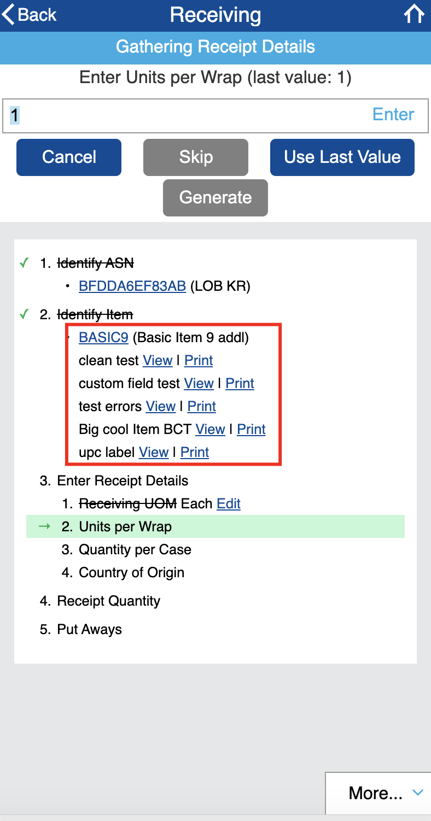
- Eg: When you go to Receiving in the Mobile Floor Apps again, the documents you selected to Show and. Auto Print, will automatically be sent to the printer that matches that document's size. If you selected Show for some available Receiving documents, you will see a link to that document where you can view and/or print that document. If you selected to Hide any Receiving documents, you will not see or print those documents.
- Example 1: Receiving:
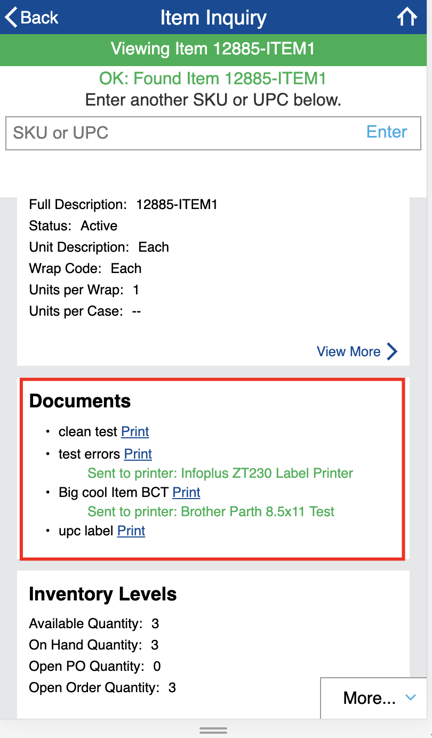
- Example 2: Item Inquiry (this is a different type of process, and therefore, the Documents section will look slightly different.
Pro Tip: In Step 1, you set up the printers that can be used for Auto Print. If you choose a document to be auto-printed, Infoplus will automatically recognize that document's size and send it to the printer that is set up to print that size document.
If your document size doesn't match one of the built-in printer sizes (8.5x11, 4x8, 4x6) it will be sent to the Miscellaneous Labels Printer.
