-1.png?height=120&name=InfoPlus-Primary-Logo%20(1)-1.png)
After you've set up an EDI connection, you should test it to ensure it is working properly. Here is a step-by-step guide to test your EDI connection.
Once you have established an EDI connection you will want to test it to make sure it is working as expected.
First, you will want to navigate to your EDI connection table and select the connection you want to test. You can click on the record or select the checkbox for it.
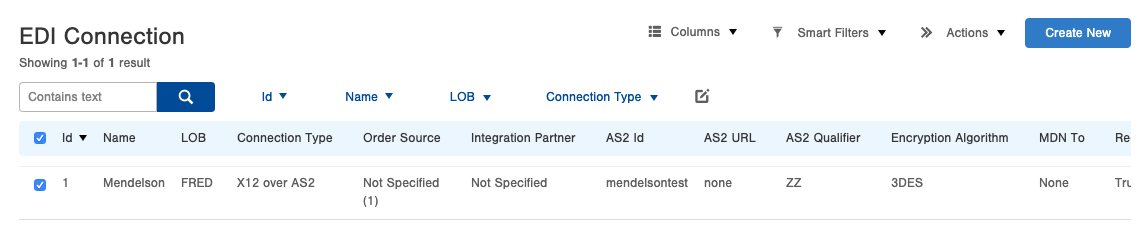
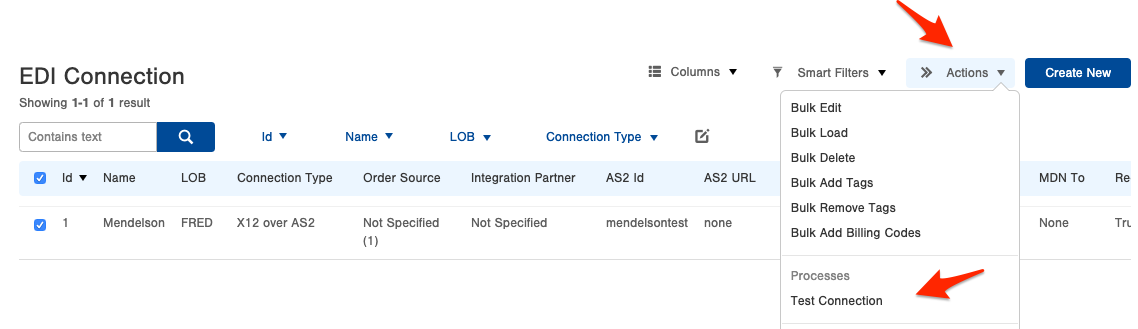
Next, select 'Test Connection' from the action menu drop-down.
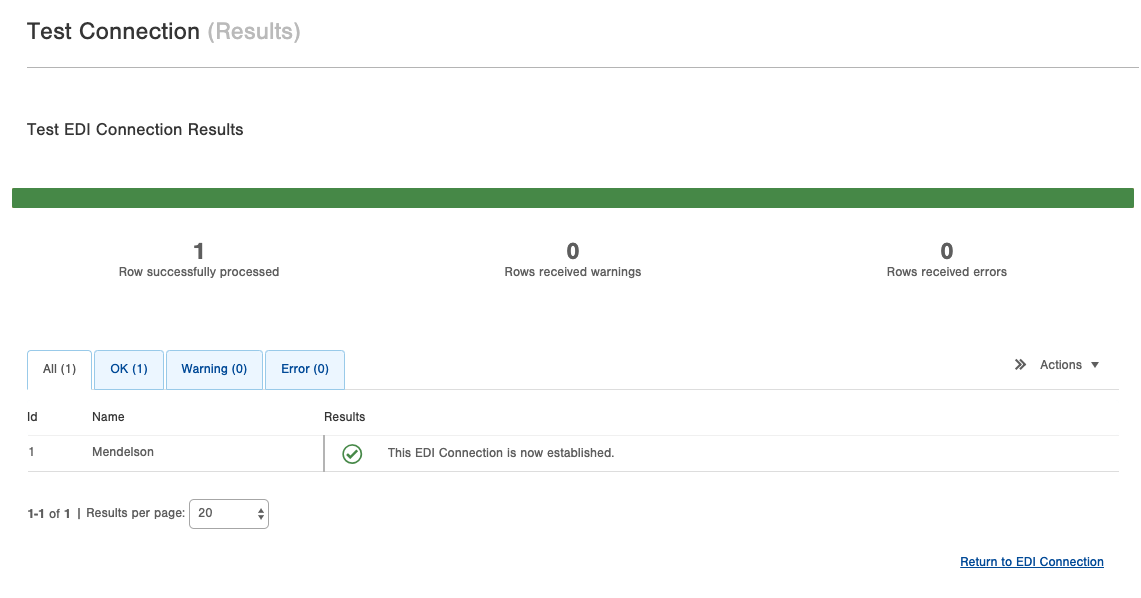
If successful you will get a confirmation screen like the one shown below. If there are errors, the green bar will turn red and the error details will populate in the error tab.
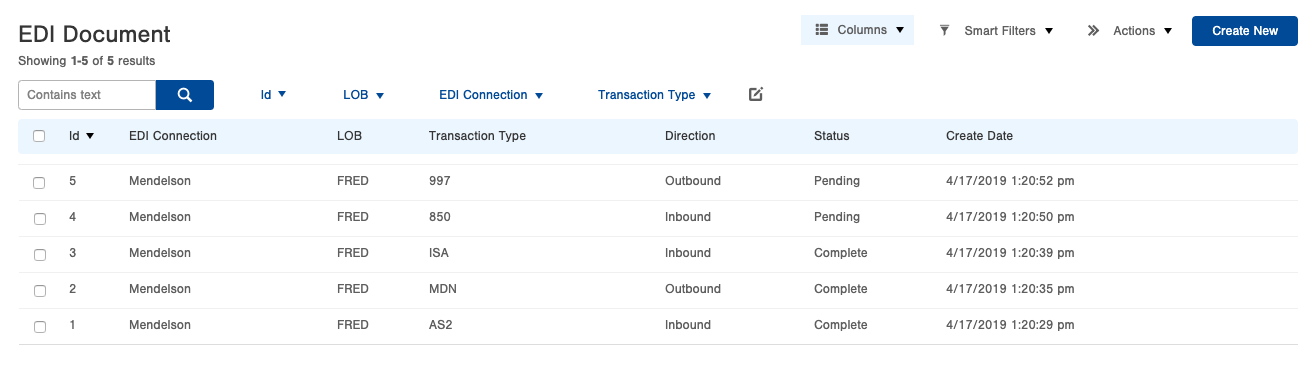
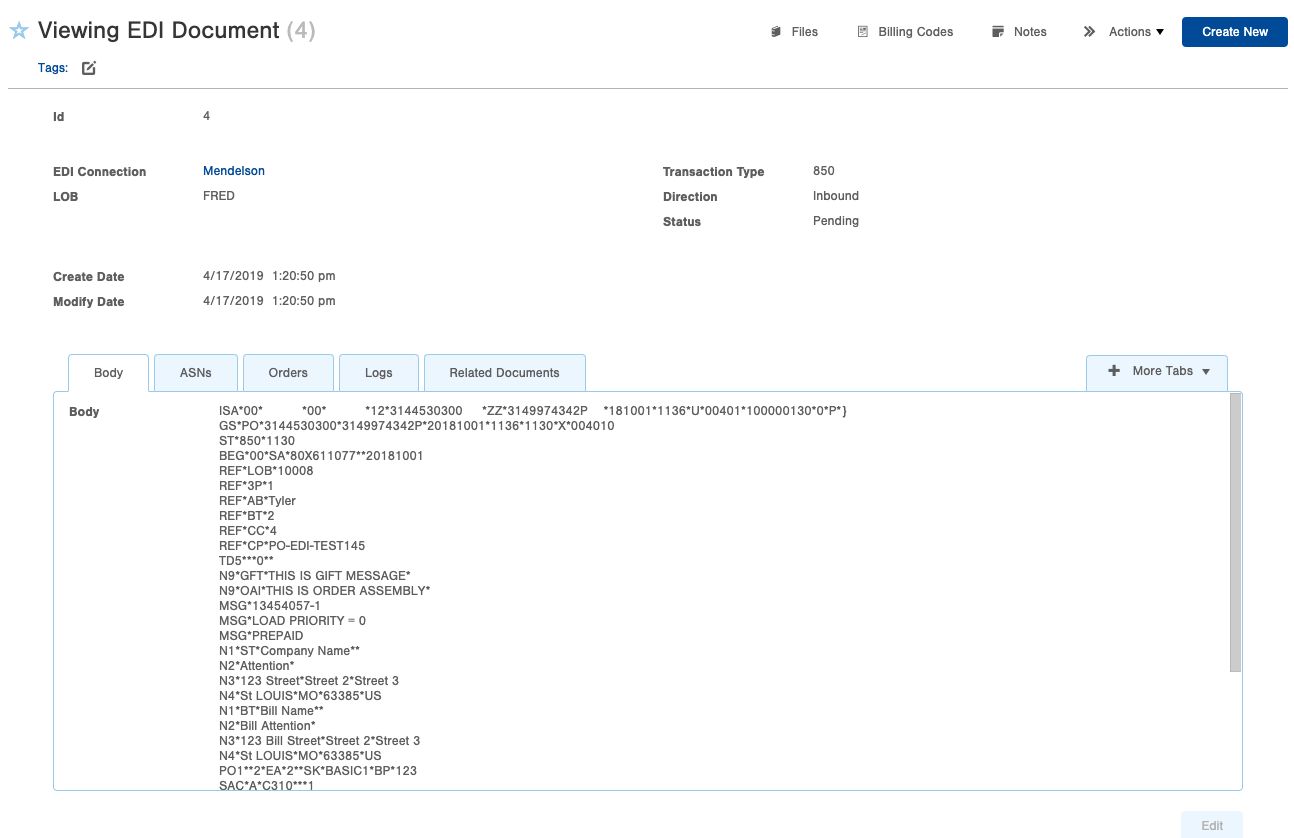
Now that the connection is established, you can focus on making sure the documents are mapped correctly and data is flowing in and out as expected. To do this, navigate to your 'EDI Documents' page. This is where all EDI transmissions in and out of the system are recorded.
More details can be found by clicking on a specific record. From there you can see pertinent information like the body request, logs, related documents, and more.
Finally, navigate to whatever table the EDI is impacting (ie order, asn, adjustment) and check the results.
