Some vendors require an EDI connection to work with them. Learn how to set up and test your EDI connection with Infoplus.
Before you can set up an EDI Connection in Infoplus, you will need to have an AS2 Partner record established, to define how documents get sent to your partner.
After you have set up an AS2 Partner, then you can define one or more EDI Connections that use that AS2 Partner. You'll want EDI Connection for each unique retailer/order source and LOB combination that you'll be trading for.
Setting Up the EDI Connection
To set up a new EDI Connection in Infoplus, navigate to the EDI Connection table and click Create New.
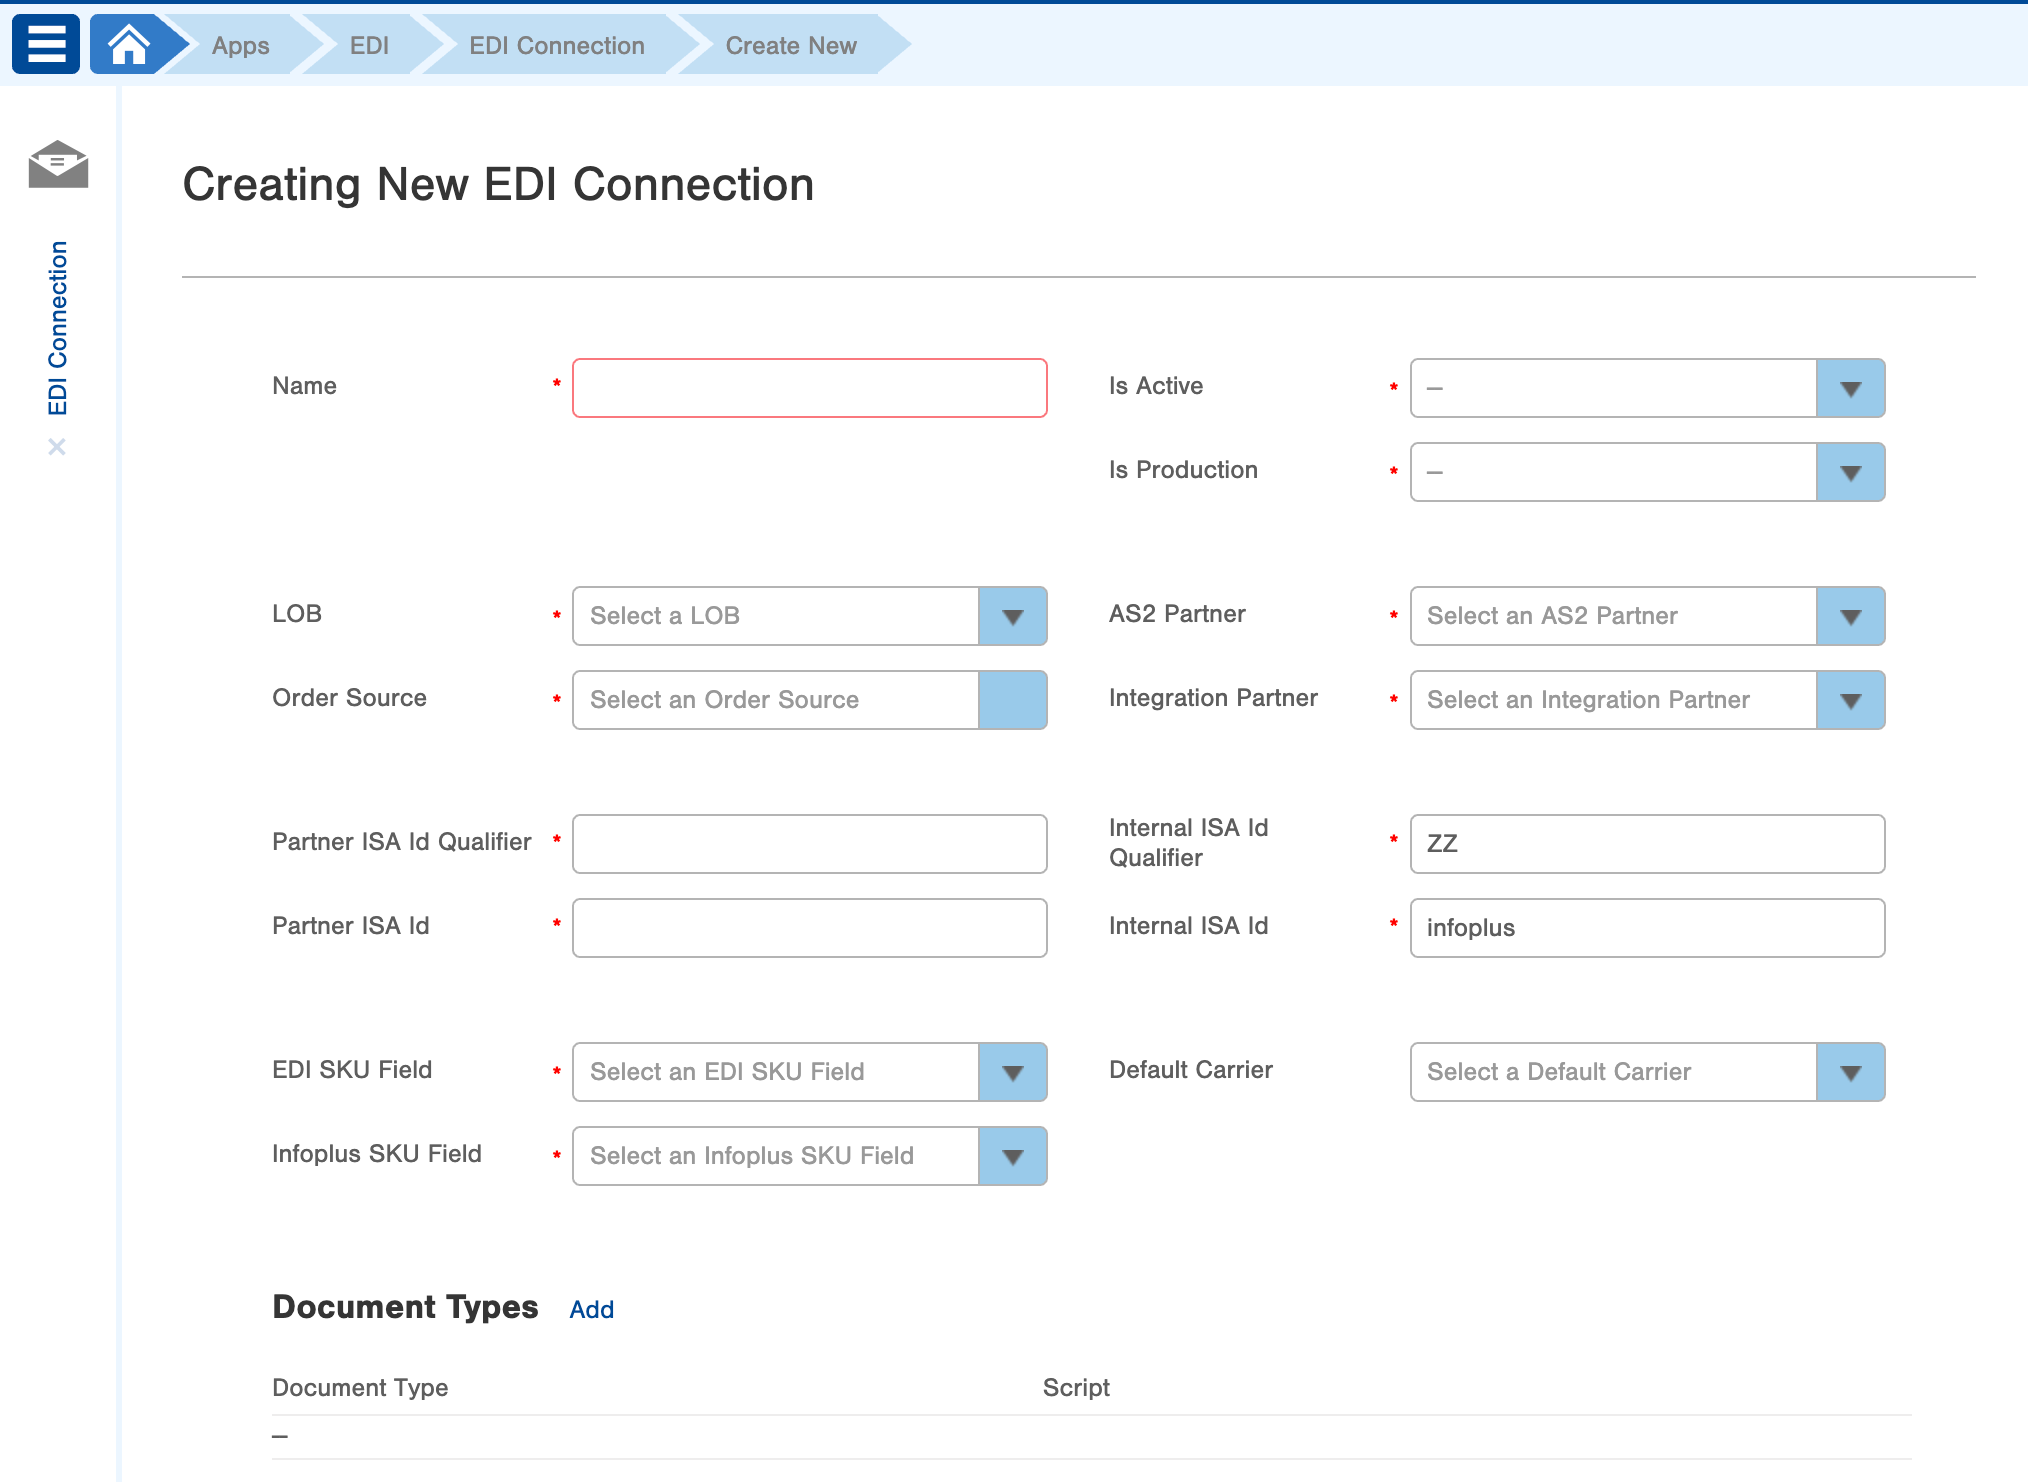
- In the Name field, give this connection a name for identification purposes. It may be helpful to include elements of the AS2 Partner, Order Source, and LOB in the name.
- Choose if you are ready for this connection to be Active, and, if this is your Production site (use True for production, False for your test site).
- Select the LOB, AS2 Partner, Order Source and Integration Partner associated with this connection.
- Enter the Partner ISA Id and Qualifier that your and your partner have agreed to use to identify documents coming from the partner for this specific connection, and the Internal ISA Id and Qualifierthat you have agreed to use to to receive documents specific to this connection.
- For example, if you have multiple EDI Connections, for multiple retailers, for a single LOB, you would need different Partner ISA Id's to differentiate those documents (to map the individual retailer to a specific EDI Connection and Order Source).
- Alternatively, if you have the same retailer sending you documents for multiple LOB's, you may be getting the same Partner ISA Id for all of those documents, and you would need unique Internal ISA Id's to differentiate them.
- In the EDI SKU Field, select the qualifier to use within EDI documents that you want to use for mapping to Items in Infoplus.
- In the Infoplus SKU Field, select the field within Infoplus that will map to EDI SKU Field.
- Optionally select a Default Carrier for this connection. For the incoming document types that could include a shipping carrier, like an 850 for example, Infoplus will try to use the carrier id from the document. If the carrier information is missing from the 850, this default carrier will auto-populate in the order that was created in Infoplus.
- Next, add all the necessary Document Types that will be used by this connection. Optionally associate a script with each document type to record or manipulate data on an incoming document.
- Note: For more information about Document Types, see the EDI Document Type Overview article. For more information about EDI scripts, see the Using EDI Scripts article.
At this point, you should be ready to have your partner send you an initial document for testing and validation. Use the EDI Document table to see documents that have been received.
