Learn how to connect ShipStation and Infoplus to create external shipping records and set up a webhook to send, view, and remove orders in ShipStation.
If you use ShipStation to ship orders and use Infoplus to place and process orders, you can connect the two systems. After placing and processing orders in Infoplus, send the orders to ShipStation. Once you have shipped the orders through ShipStation, Infoplus will pull shipment information back into the order in Infoplus for tracking.
Here's an overview of the steps to set up the integration and ship orders using ShipStation:
- In Infoplus, create an External Shipping System record for ShipStation.
- In ShipStation, add a Webhook for Infoplus.
- In ShipStation, confirm or add the same carriers you will be using when placing orders in Infoplus.
- Create and process orders in Infoplus.
- Send the orders from Infoplus to the external shipping system. (This can be done manually after fulfillment (steps below), or during fulfillment. See Create a Fulfillment Plan and/or Run Fulfillment for more information.)
- Ship the orders in ShipStation.
This article covers the following:
- Create an External Shipping System Record for ShipStation
-
Create an Infoplus Webhook in ShipStation
- Send Orders to ShipStation
- View Orders in ShipStation
- View ShipStation Shipment Information in Infoplus
- Remove Orders from ShipStation
Create an External Shipping System Record for ShipStation
- Access the External Shipping System table. Two ways:
- From the Dashboard: Click the Warehouse Operations tab, click the Manifest Setup app, then click the External Shipping System table.
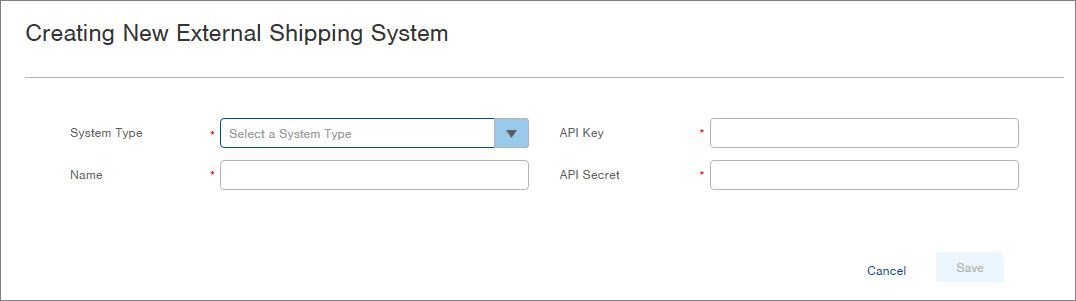
- From the Quick Actions shortcut: Press a dot (period) on your keyboard, then select External Shipping System from the list of Quick Actions. - Click the Create New button in the top right. The Creating New External Shipping System screen appears.
-
In the System Type field, select ShipStation.
-
In the Name field, give this connection a name for identification purposes (e.g., ShipStation1).
-
For the API Key field, go to ShipStation and click the Wrench to go to the setting page. Click the Account dropdown in the left menu and go to API Settings. Now copy the API Key and then paste the API Key into the API Key field in Infoplus. Lastly, copy the API Secret and then paste it into the API Secret field in Infoplus.
-
For the field, go to ShipStation and copy the API Secret. Then paste the API Secret into the API Secret field in Infoplus.
Here's a sample screenshot from ShipStation showing the API Key and API Secret: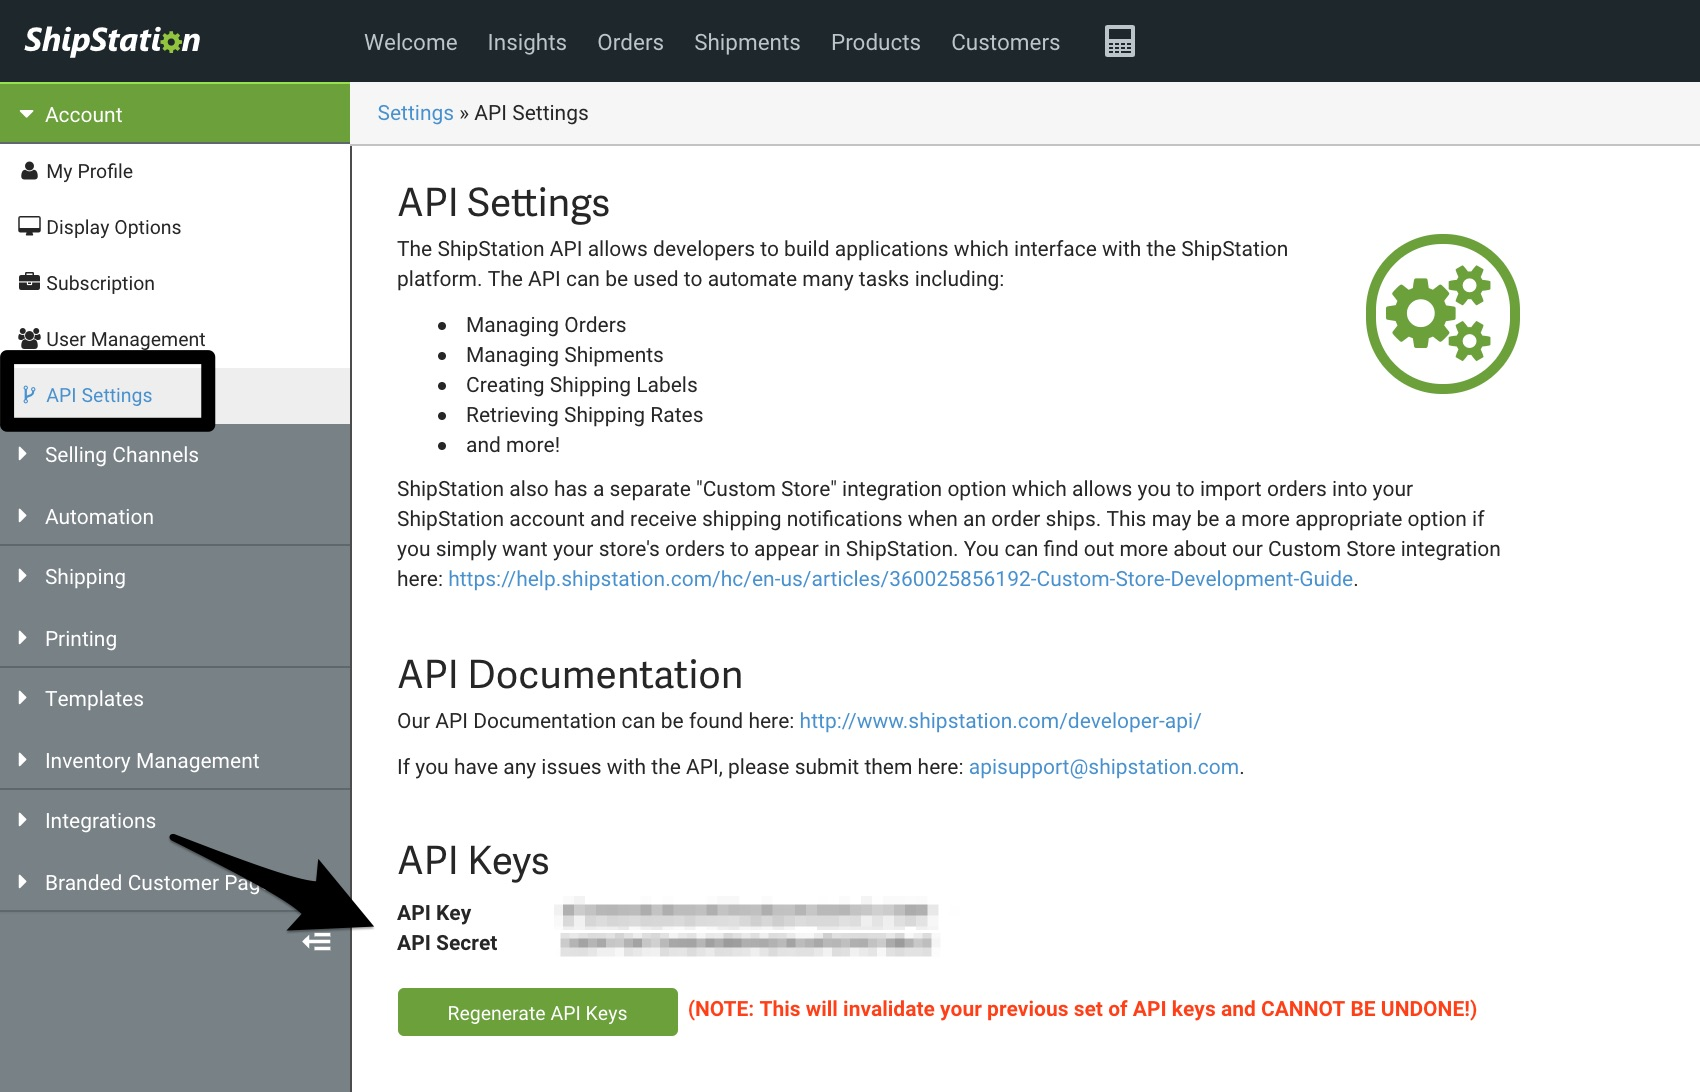
- Click Save.
Create an Infoplus Webhook in ShipStation
A Webhook allows Infoplus to be automatically notified when Shipments are created in ShipStation.
-
Open ShipStation and click on the Wrench icon at the upper right to access your Account Settings.
-
On the left menu pane, click the Integrations tab on the left side of the window, revealing the Integration Partners sub-tab.
-
Click on the Integration Partners sub-tab.
-
Click on Webhooks within the main part of the page.
-
Click the Add a Webhook button.
-
Fill out the form that appears:
-
Enter “Infoplus” as the Name/Description.
-
Select the "On Orders Shipped" option.
-
Select the "(All Stores)" option.
-
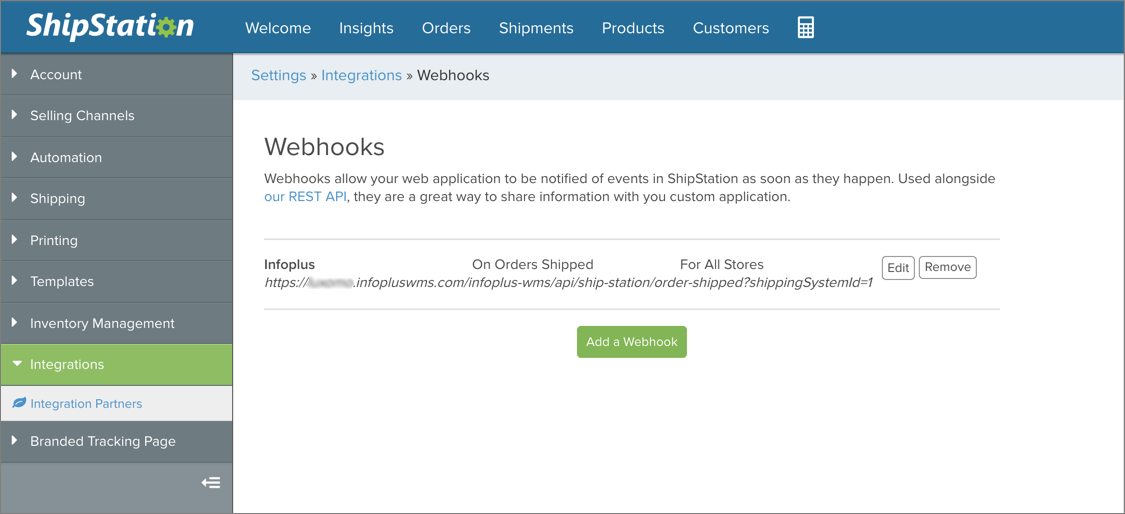
Enter the Send to URL information in the following format: https://yourcompany.infopluswms.com/infoplus-wms/api/ship-station/order-shipped?shippingSystemId=1
-
Notice that the URL starts with "https://“, the next part is your Infoplus URL, which is the URL for your Infoplus instance, and there is no slash (/) at the end.
-
Also, notice that the number at the end of the URL must be the Id of the ShipStation External Shipping System record in your Infoplus account. To find this Id in your account, in Infoplus, navigate to the External Shipping System table and find the Id value on your ShipStation record.
-
-
-
Click Save. ShipStation integration has been established. Here’s an example of a completed Webhook:
Send Orders from Infoplus to ShipStation
You can manually send the orders to ShipStation using the steps below or you can select the External Shipping System during fulfillment which will automatically send orders to ShipStation. See Create a Fulfillment Plan and/or Run Fulfillment for more information on selecting the External Shipping System during fulfillment.
- Open the Order table and select each Order you want to send to ShipStation (click the checkbox next to each Order record). See View Orders for steps on accessing and searching for Orders.
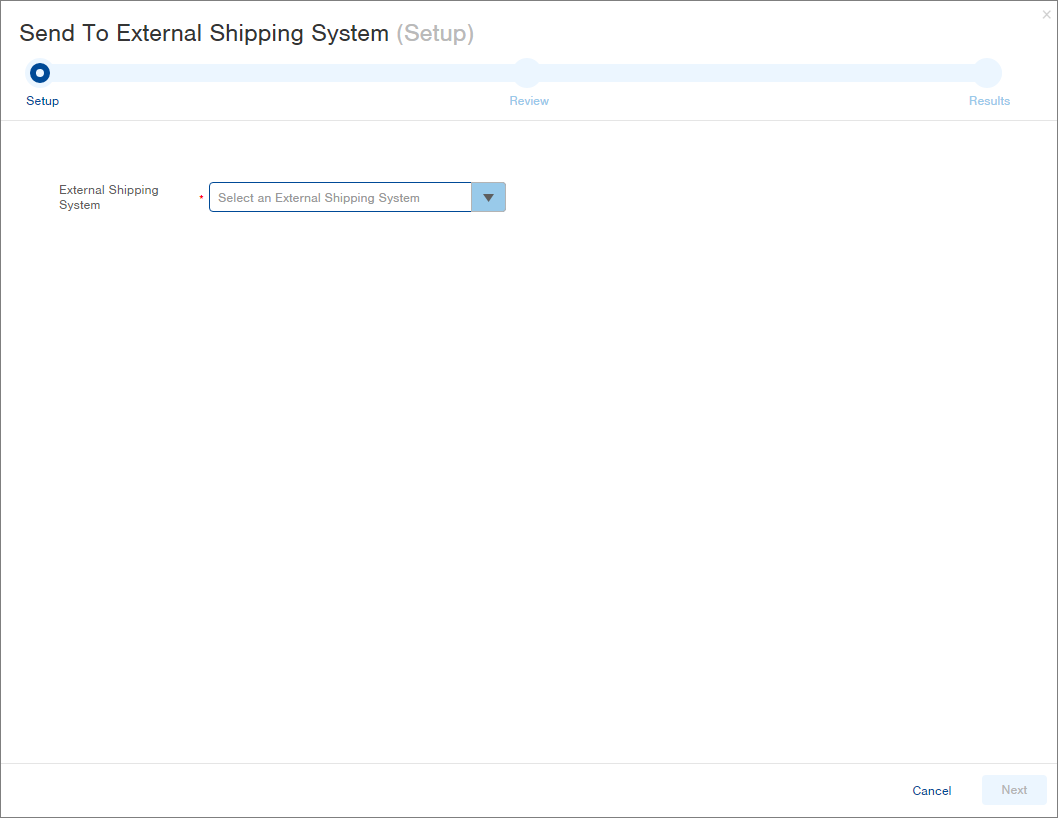
- Click the Actions button and select Send to External Shipping System. The Setup step in the process appears.
-
In the External Shipping System field, select the ShipStation system.
-
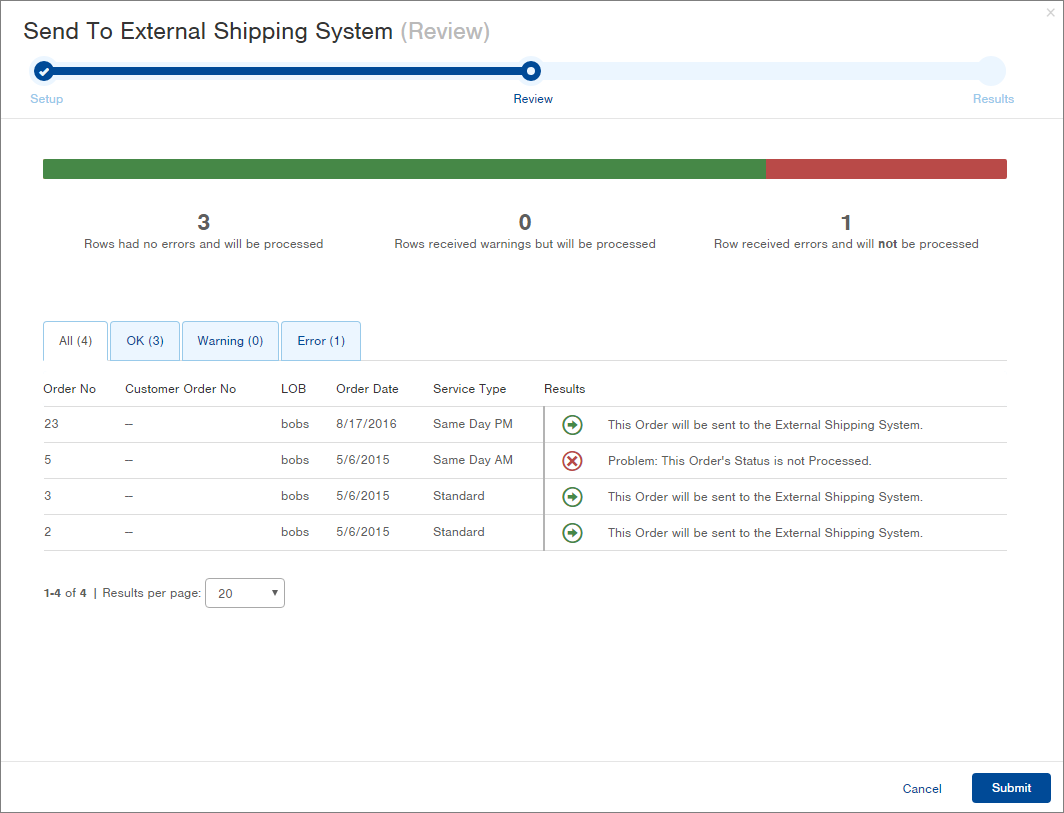
Click Next. The Review step in the process appears. A green arrow will display next to each Order that will be sent to ShipStation. If there are any errors or warnings, these will also display in the Results section. (In the example below, the order showing an error was not processed, so it was not ready to be sent for shipment). You will still be able to continue through the process, sending the orders that received no errors.
-
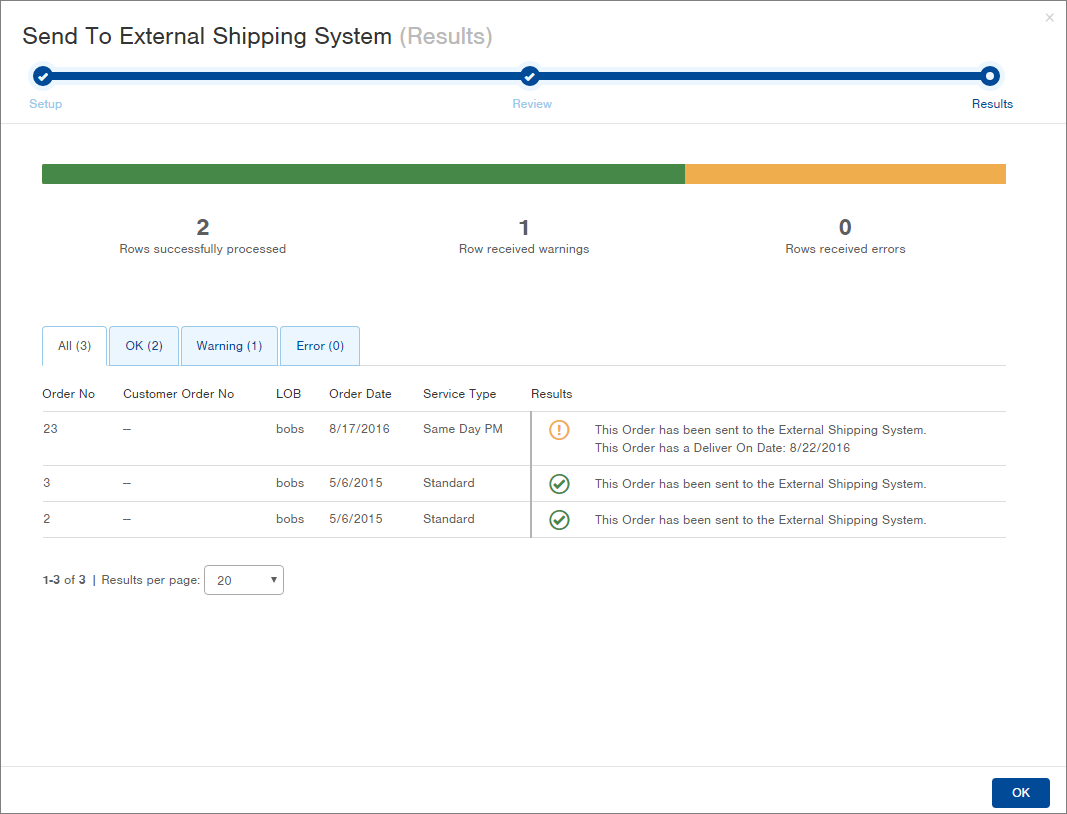
Click Submit. The Results step in the process appears. You can now view the orders in ShipStation (see screenshots later on this page).
NOTE: The Warning (exclamation point) result shown below displays when an Order has a "Deliver on Date". The Order will still be sent to ShipStation, but a note will appear on the Order regarding the "Deliver on Date".
-
Click OK to close the window.
NOTE: In the Order table, you can add the External Shipping System column to your view to see which orders were sent to a Shipping System (see screenshot below). You can also add the External Shipping System column as query criteria (e.g., to search for all orders that were sent to "ShipStation"). See Search within Tables and Modify Column Display for more information.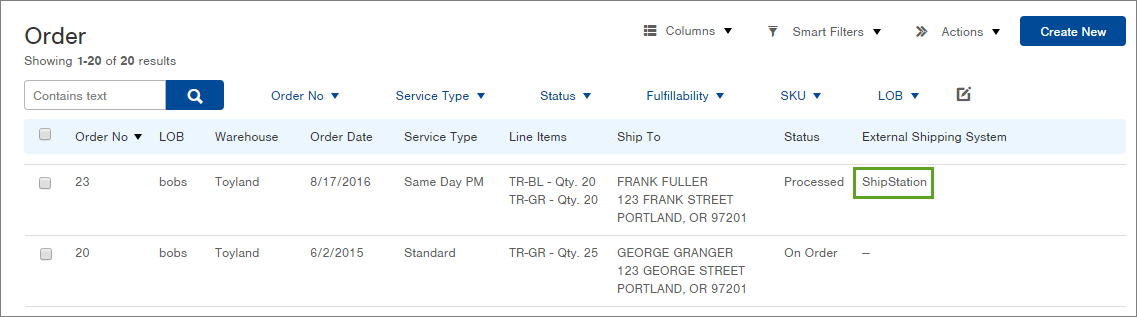
View Orders in ShipStation
Here's a sample screenshot of the Orders grid in ShipStation:

Notes:
- If the Order that was sent to ShipStation had a "Deliver on Date", a
 will display in the Notes column. For Order #23 (the second order above), this note reflects the Deliver on Date.
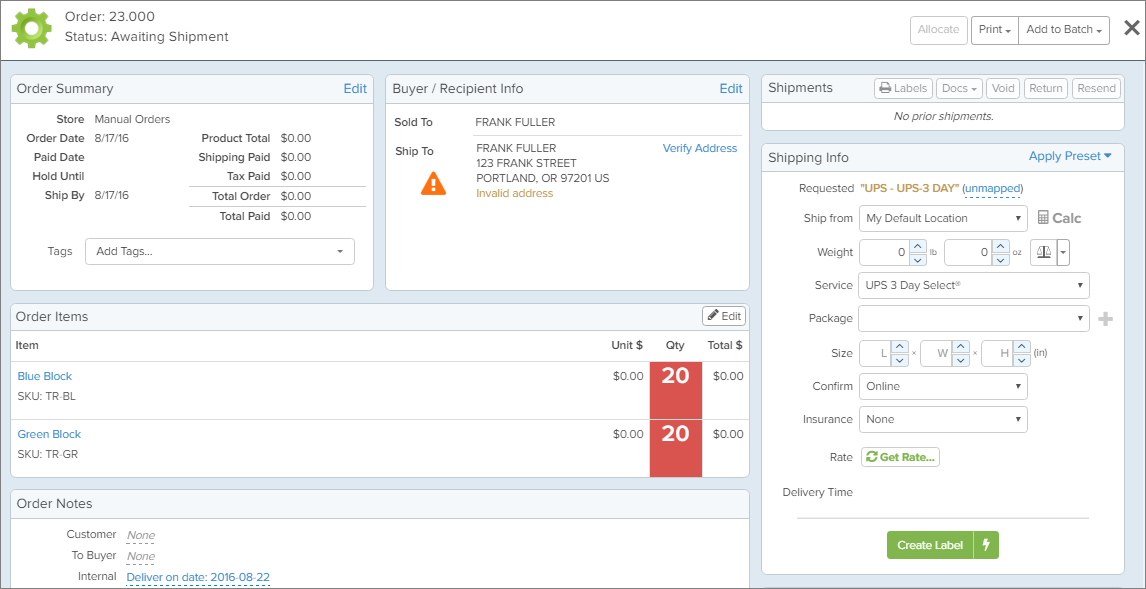
 - Click on the Order number link to open an Order in ShipStation. Here is a sample screenshot of Order #23:
-
The Deliver on Date information appears next to the Internal field in the Order Notes (shown at the bottom of the above screenshot).
-
If the carrier in the Infoplus order could not find a matching Carrier in ShipStation, "unmapped" will appear next to the Carrier in the Shipping Info on the right. You will need to map the carrier to ship the order in ShipStation or you can change the carrier in ShipStation. If you change the carrier, this information will get sent to Infoplus when you get shipments from ShipStation.
View ShipStation Shipment Information in Infoplus
At any time, you can view shipment information from ShipStation. For orders that shipped, the Order status will change to "Shipped", and the following will be pulled into Infoplus:
- The Tracking Number
- NOTE: If multiple parcels were shipped on the order, only the lead tracking number will be communicated back to Infoplus
- The Carrier (if changed in ShipStation)
- Total weight
- The total published freight rate
Here are the steps to view shipments from ShipStation:
- Access the Order table. Two ways:
- From the Dashboard: Click the Account Management tab, click the Order Management app, then click the Order table.
- From the Quick Actions shortcut: Press a dot (period) on your keyboard, then select Order from the list of Quick Actions.
- Select orders that were sent to ShipStation by adding the External Shipping Station column to the query criteria above the table and selecting “ShipStation” from the drop-down.
-
NOTE: You can narrow your search query further by selecting a particular order Status such as “Processed” or “Shipped”.
-
Remove Orders from ShipStation
If you need to modify or cancel an order that you sent to ShipStation, here is an overview of the steps you should take in Infoplus:
- You will need to remove the order's connection to ShipStation.
- NOTE: This will not remove the Order record from ShipStation. If you plan to resend an order to ShipStation, do NOT cancel the order in ShipStation as you will not be able to resend the same Order number to ShipStation.
- Then cancel or modify the order in Infoplus.
- NOTE: You will need to use the "Edit Processed Orders" process to modify a Processed order.
- If you made modifications, you can then resend the order to ShipStation using the same steps above. The modified information will appear in the original order record in ShipStation.
- NOTE: If you try to resend an order to ShipStation without removing it first, an error will indicate that "This order has already been sent to an External Shipping System."
Here are the detailed steps:
- Open the Order table and select each Order you want to send to ShipStation (click the checkbox next to each Order record). See View Orders for steps on accessing and searching for Orders.
- Click the Actions button and select Send to External Shipping System. The Review step in the process appears.
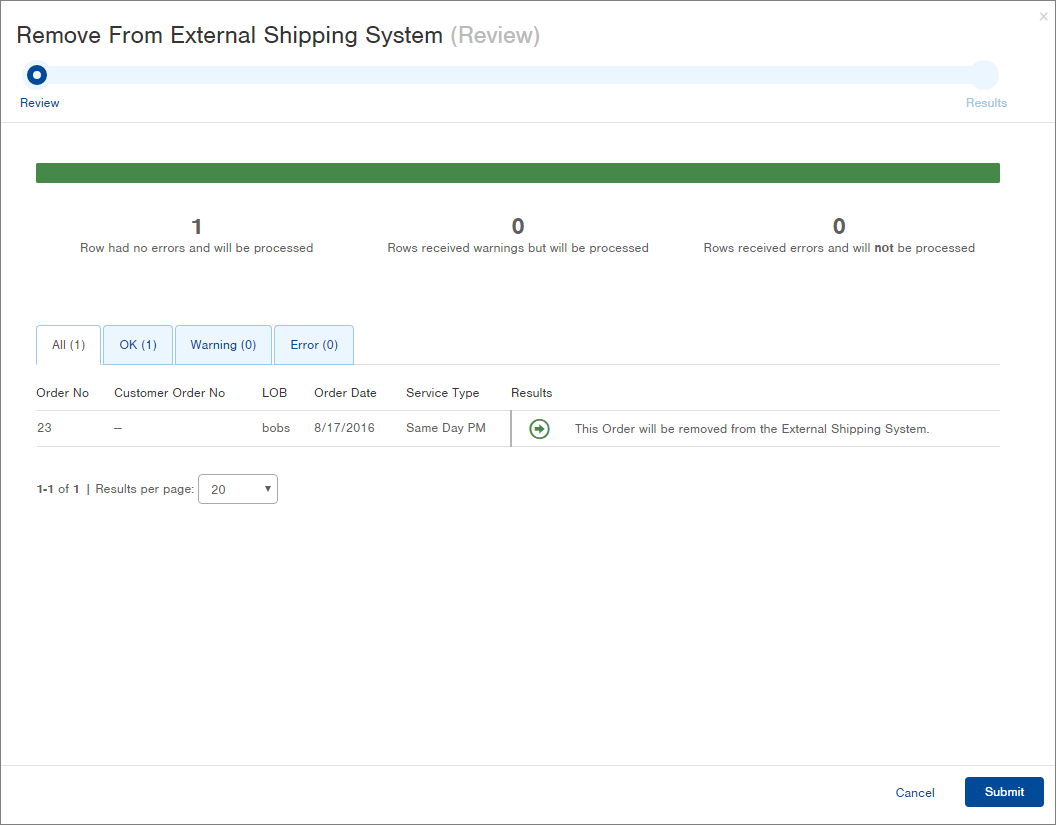
- Click Submit. The order(s) will be removed from ShipStation as far as Infoplus is concerned, but the order record will still display in ShipStation. The Results step in the process appears.
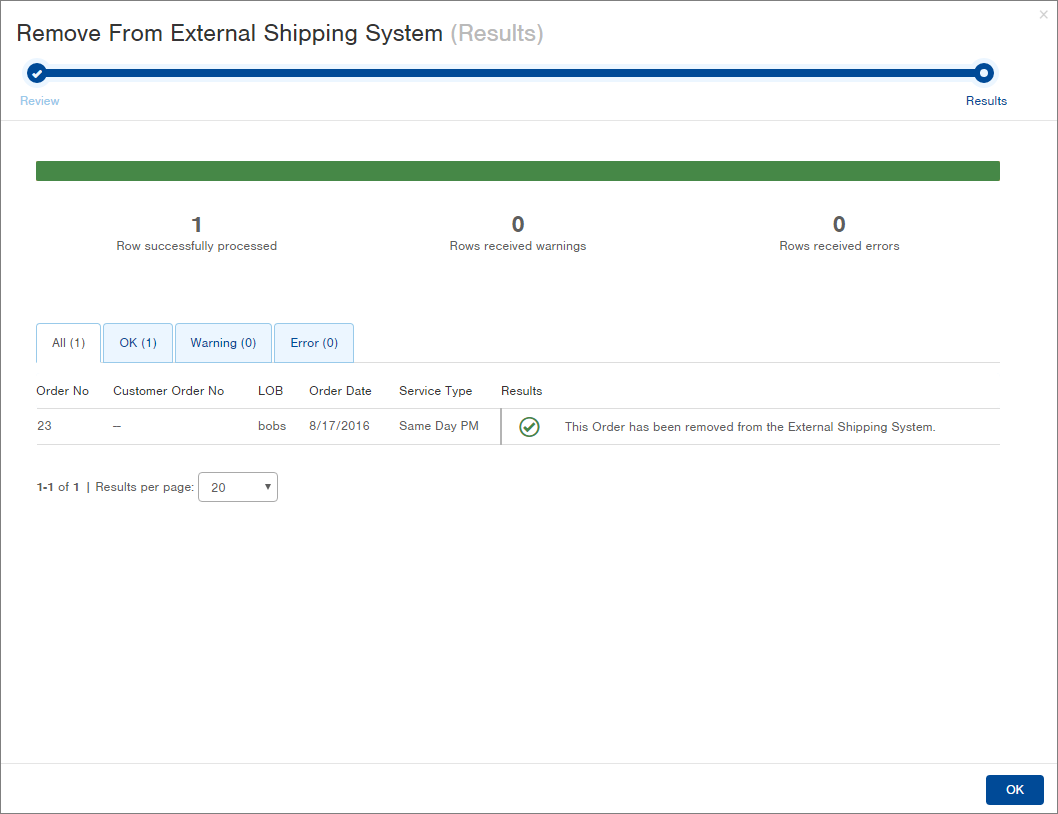
- Click OK to close the window.