Learn how to create a Pick Scan Scheme to make a set of scanning requirements for picking items for enhanced quality control.
A Pick Scan Scheme is a set of scanning requirements for picking items to fulfill orders. You can require scanning the Item's barcode, or the Item's location, neither, or both. You can specify different scanning requirements for loose picks and casebreak picks.
A Pick Scan Scheme that requires pickers to scan an Item provides an additional layer of quality control when picking. This is especially helpful if you allow items to mix in warehouse locations.
For example, if you sell 200 different kinds of coffee in 8 oz bags, and most of those bags look the same, use a Pick Scan Scheme that requires items be scanned when picking them from warehouse locations. This helps ensure the correct product is picked.
NOTE: A "Default" Pick Scan Scheme will be available in Infoplus which requires the Location be scanned when picking, but not the Item. If you have other scanning requirements, you can edit the Default or create your own schemes.
A few things to know/consider:
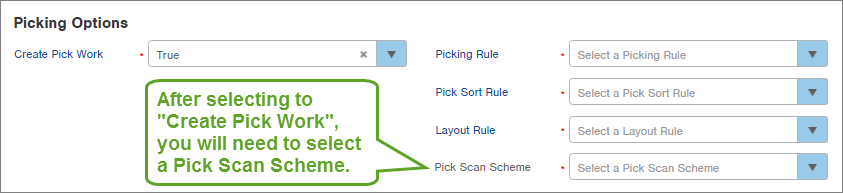
- A Pick Scan Scheme is selected during fulfillment. You can make this part of the Fulfillment Plan or simply make your selection when running fulfillment. Here's where you'll see the field when running fulfillment:
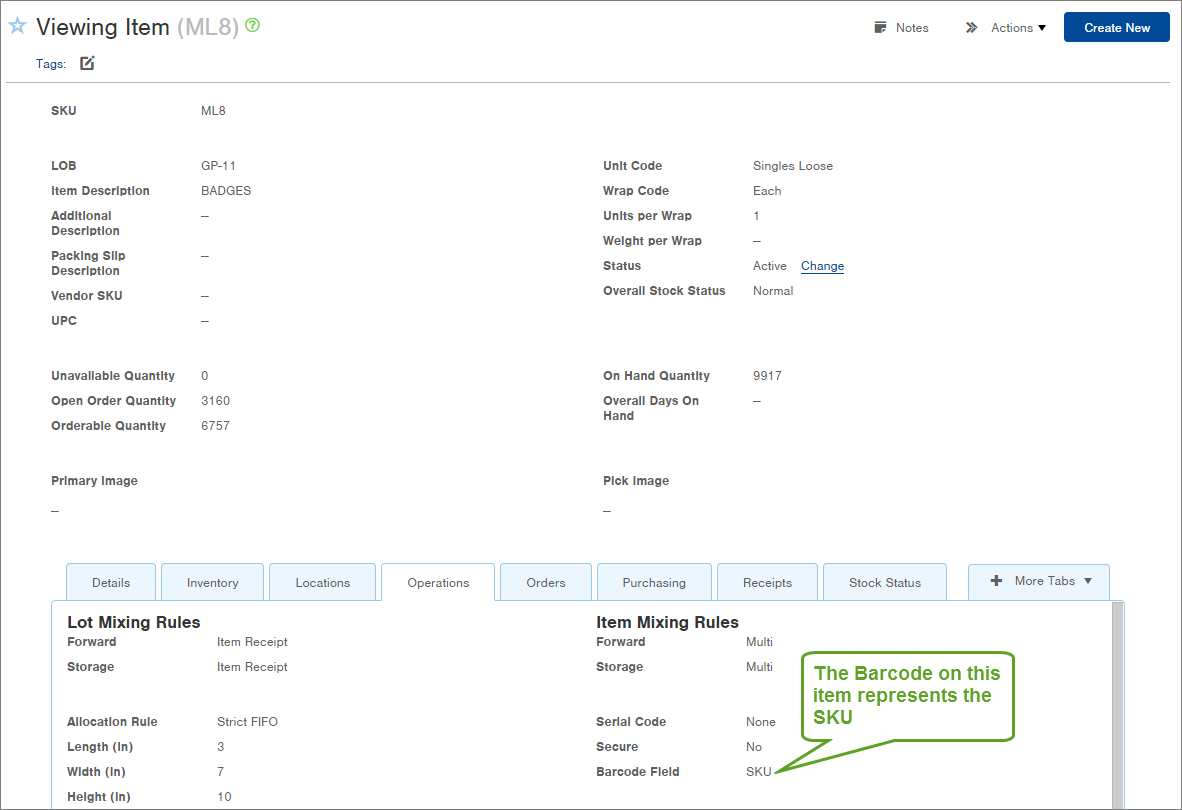
- If you want to require an item be scanned in order to be picked, the Item's Barcode field must be filled in. This field tells Infoplus what the Item Barcode represents: the SKU, UPC, Vendor SKU, or a Custom Field. Additional barcode options can be specified in the Pick Scan Scheme. Here's an example of the Barcode field in an Item record:
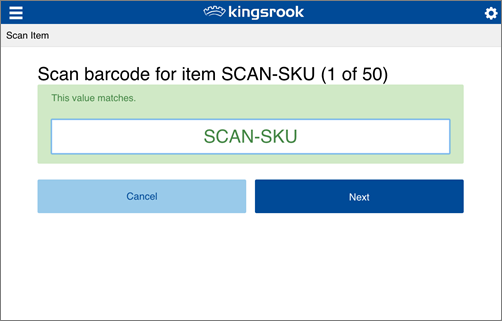
See Create/Edit Items for more information on an Item's Barcode field. - If the Pick Scan Scheme is set to require item scanning, a prompt like this will appear when the pick work is being performed:

Create a Pick Scan Scheme
- Access the Pick Scan Scheme table. Two ways:
From the Dashboard: Click the Warehouse Operations tab, click the Fulfillment Setup App, then click the Pick Scan Scheme table.
From the Quick Actions shortcut: Press a dot (period) on your keyboard, then select Pick Scan Scheme from the list of Quick Actions. - Click the Create New button in the top right. The Creating New Pick Scan Scheme screen appears.

-
Type a Name for the Scheme (e.g., Scan Location and Item).
Loose Scanning Options
- In the Scan Location field, select True if you want to prompt the user to scan the location when picking items. Select False to not require location scanning
- In the Scan Item field, select True if you want to prompt the user to scan the item when picking items. Select False to not require item scanning.
-
In the Allow Item without Barcode field, select True if you want to allow picking an item where the Barcode field is empty (meaning the item has no scannable attribute). Select False if you want to only allow picking items where the Barcode field is completed (SKU, UPC, Vendor SKU, or a Custom Field).
NOTE: If you require an Item have a completed Barcode field to be picked (by selecting False in the field above) and an item in an order that is to be fulfilled does NOT have a selected Barcode attribute, the inventory will be allocated to the order, but Pick Pack and Ship will fail. Within the Fulfillment Process record, you can click the View Details link at the top of the record to see the error. Here's an example of the error message: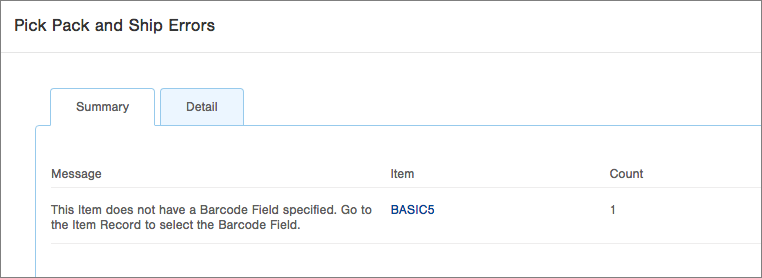
If you encounter this error, update the item's Barcode field, and then return to the Fulfillment Process record where you can re-run Pick Pack and Ship. See Rerun Pick, Pack, Ship for more information on that process.
-
In the Scan Location for Item without Barcode field, select True if you want to prompt the user to scan the Item's Location when the Item's Barcode field is blank. Select False if you do not want to require location scanning when the Item's Barcode field is blank.
-
If an Item has multiple barcodes available and Scan Item is set to True, you may allow the user to scan a barcode other than the one specified in the Item record. To specify these Additional Item Barcode Fields, click the Add link in that area of the form. The Add Additional Item Barcode Field pop-up screen appears.
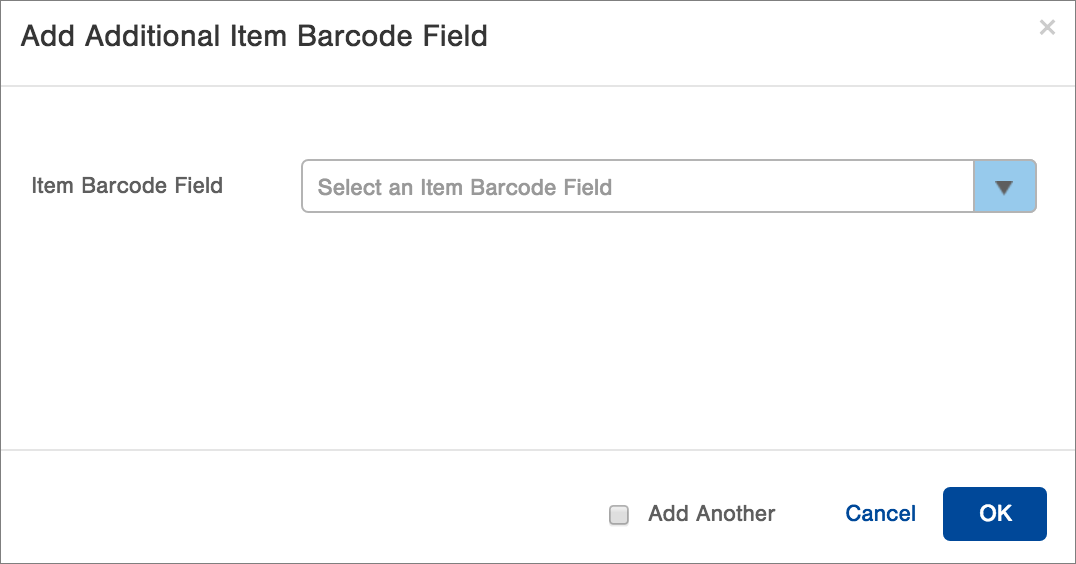
- In the Item Barcode Field, select the type of Additional Barcode that may be scanned.
- If more Item Barcode Fields are needed, check the Add Another box and click OK. Then make a new selection. This process may be repeated as needed.
- When you are finished adding Item Barcode Fields, ensure that the Add Another box is unchecked and click OK. Here is an example of a set of Additional Item Barcode Fields:

-To Edit or Delete an Additional Item Barcode Field from the set, click on the gear icon (
 ) and make the appropriate selection from the pop-up menu.
- To add more Item Barcode Fields to the set, use the Add link as described above.
Casebreak Scanning Options
-
In the Scan Location field, select True if you want to prompt the user to scan the location for casebreak picks. Select False to not require location scanning for casebreak picks. (Casebreak picks are for items where the "Casebreak Enabled" field has been set to Yes. See Create/Edit Items for more information on casebreak-enabled items.)
-
Click Save. The Pick Scan Scheme is now available for use during fulfillment.