Keep up to date on your scheduled plans via dashboard and/or email alerts or by accessing the Scheduled Plan Log.
Scheduled Plans are Fulfillment Plans and/or Replenishment Plans that are scheduled to run automatically.
When Scheduled Plans run, you have these options for reviewing activity:
- Receive Alerts
- View the Scheduled Plan Log and Audit Activity
Receive Alerts About Scheduled Plans
You can receive Alerts about Scheduled Plans in your email and/or with a visual summary on your Infoplus Dashboard.
- From the Dashboard, click the
 in the Alerts section and select Manage Alerts. The Edit Alert Settings window appears. The screenshot below shows the "Scheduled Plan" section of the window.
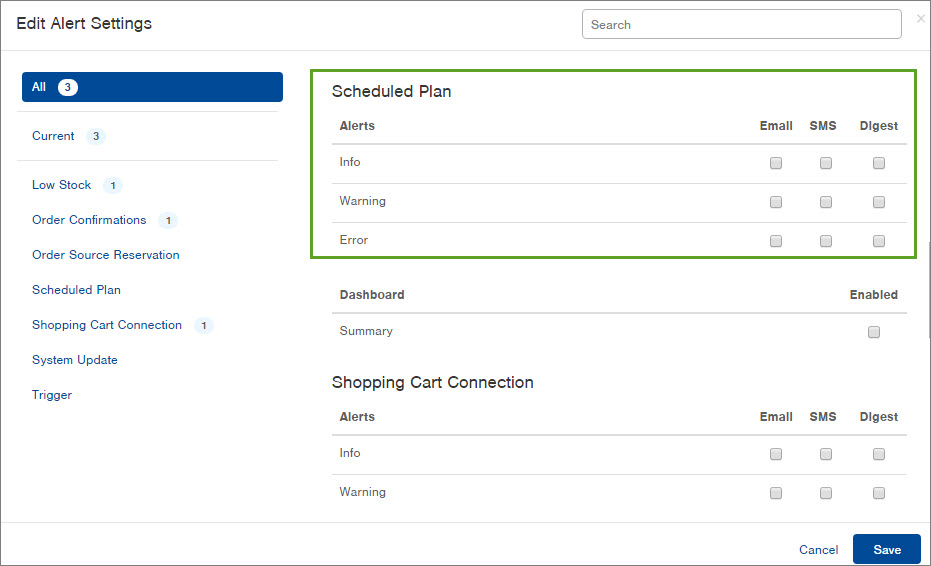
-
Scroll to the Scheduled Plan section and select the type of alert you want (Email, SMS and/or Digest), SMS and Digest do not exist in production, so we need to modify this text and add a different screencap for each message level (Info, Warning and Error). Each message level represents a different severity of the alert. You can select multiple message levels and types of alerts for each alert setting.
-
Here's an example: If you want to be alerted via email when an error occurs with a Scheduled Plan, click the Email checkbox next to the Error message level.
-
NOTE: Emails are sent as soon as the alert happens. The email will include a link to view the Alert record in Infoplus.
-
-
If you want to see a Summary of alert messages on the Dashboard in Infoplus, click the Enabled checkbox in the Dashboard section. Here’s an example of the Dashboard showing a summary of "Scheduled Plan" Alerts:
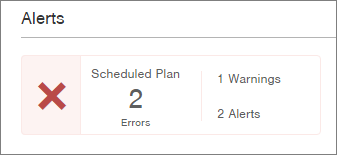
NOTE: If you click on the Alerts summary on the Dashboard, you will go to an "Alerts" table containing more detail about each Alert. Here's an example of the Alerts table: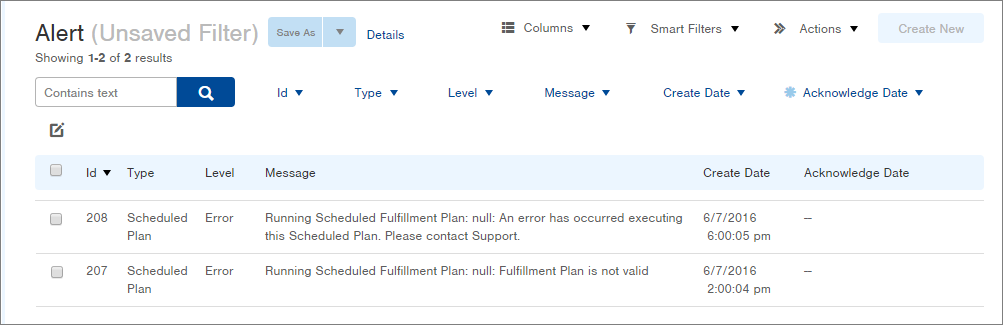
For more information on working with Alerts, see Alerts. -
When you have set all Alert Settings, click Save.
Click on the Alerts summary on the Dashboard, you will go to an "Alerts" table containing more detail about each Alert. Here's an example of the Alerts table:
View the Scheduled Plan Log and Audit Activity
The Scheduled Plan Log table displays all activity on Scheduled Plans. You can see when the plan started and ended, the status, and any messages. You can also view an Audit for details on how the plan was executed.
- Access the Scheduled Plan Log table. Two ways:
- From the Dashboard: Click the "Account Management" tab, click the "Activity" App, then click the "Scheduled Plan Log" table.
- From the Quick Actions shortcut: Press a dot (period) on your keyboard and select "Scheduled Plan Log" from the list of Quick Actions.
The Scheduled Plan Log table appears. Here's an example of the table: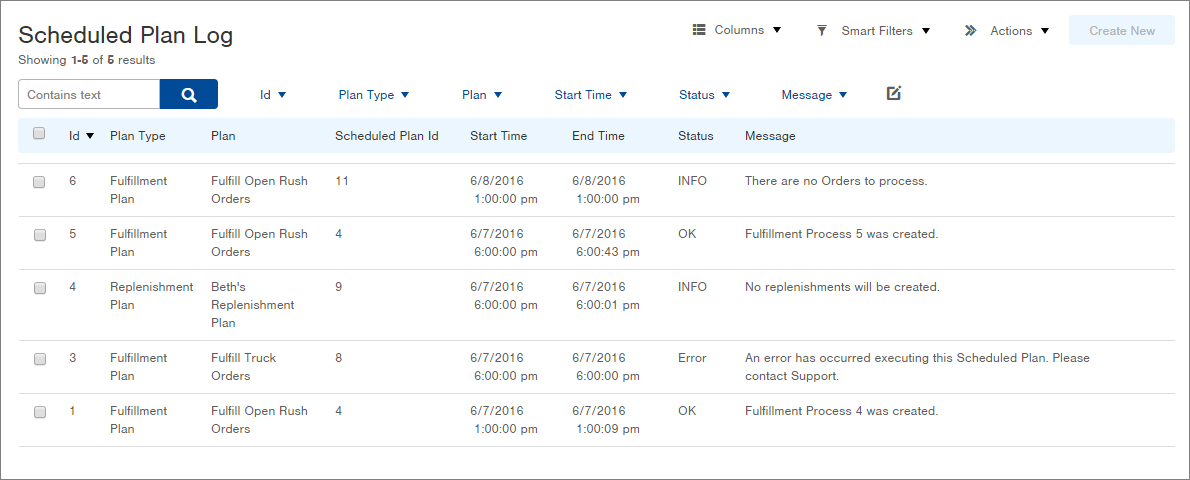
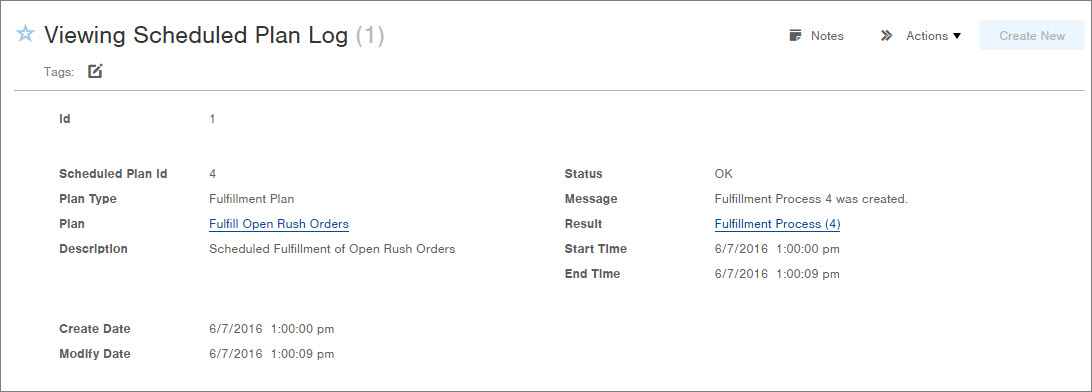
- Click on a record to view more detail. Here's an example:
- If you want to see more information about how the plan was executed, click the Actions button and select Audit. Here's an example of an Audit:
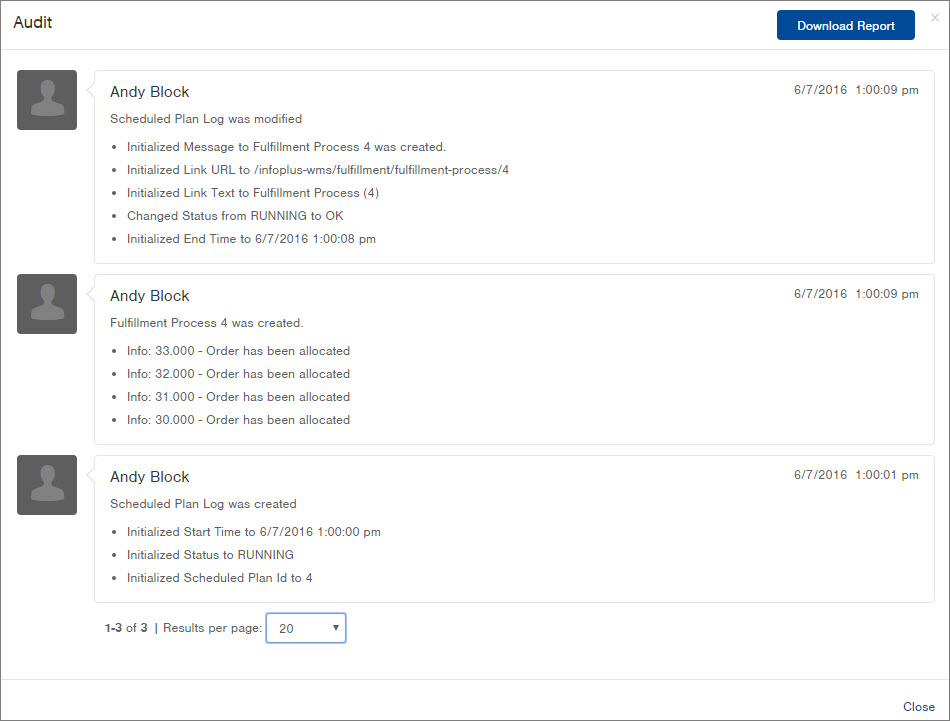
In the above Audit example, from bottom to top, you can see when the Scheduled Plan Log began and what activity occurred.
NOTES:-
An Audit in the "Scheduled Plan Log" table indicates activity on the Scheduled Plan Log. It does not necessarily indicate the success or failure of the associated process (e.g. Fulfillment Process or Replenishment Process). You should view the Fulfillment Process or Replenishment Process record for that information.
-
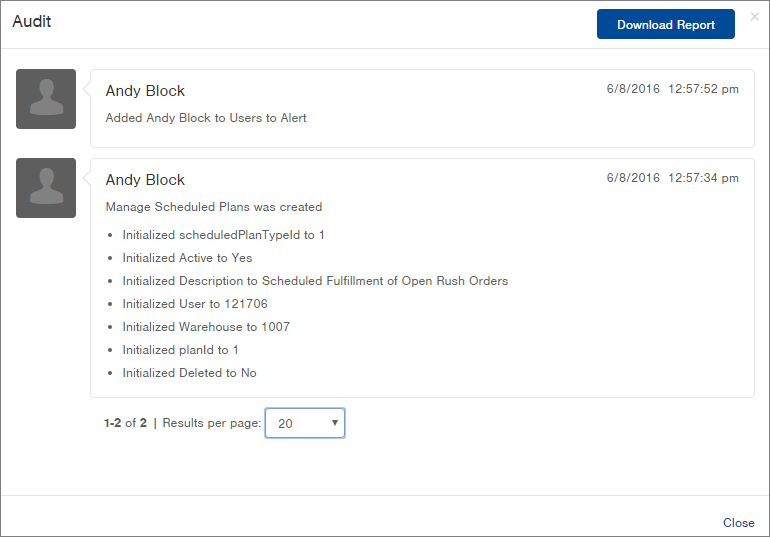
In addition, if you want to Audit activity regarding the creation of and edits to the Scheduled Plan itself, access the "Manage Scheduled Plan" table. Click the double arrows at the end of the plan and select Audit. Here's an example of an Audit on the Scheduled Plan record:
-
- If you want to download audit details to Excel, click the Download Report button and make the necessary selections.
- When you are finished with the Audit window, click Close.
