Step-by-step instructions for how to set up and connect your scales to Infoplus to automate steps in packing and shipping.
Once you have installed Infoplus LocalConnect and the application is running, connect your scale(s) to Infoplus. This step tells Infoplus which scales to read when shipping packages using the Shipping Station Mobile Floor App.
Note: Only one scale can be used in the Infoplus app per session.
- Access the "Scale" table. Two ways:
From the Dashboard: Click the “Warehouse Operations” tab, click the “Equipment Setup” App, then click the “Scale” Table.
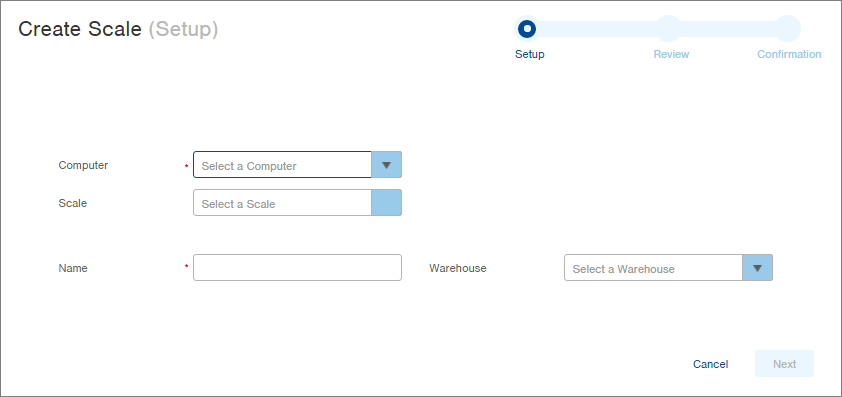
From the Quick Actions shortcut: Press a dot (period) on your keyboard, then select "Scale” from the list of Quick Actions. - Click the Create New button in the top right. The Setup step in the Create Scale process appears.
-
Click the drop-down menu next to the Computer field. All computers found by Infoplus LocalConnect will appear in the drop-down menu. Select the computer you want to connect to the scale.
-
Click the drop-down menu next to the Scale field. All scales found by Infoplus LocalConnect will appear in the drop-down menu. Select the scale to set up. NOTE: Any scales that have already been set up will not appear in the drop-down menu.
-
In the Name field, give the Scale a name (i.e., DYMO Shipping scale S50).
-
(Optional) In the Warehouse field, select the Warehouse for the Scale. This field is for categorization of scales for searching purposes only (i.e., to display all scales for a particular warehouse).
-
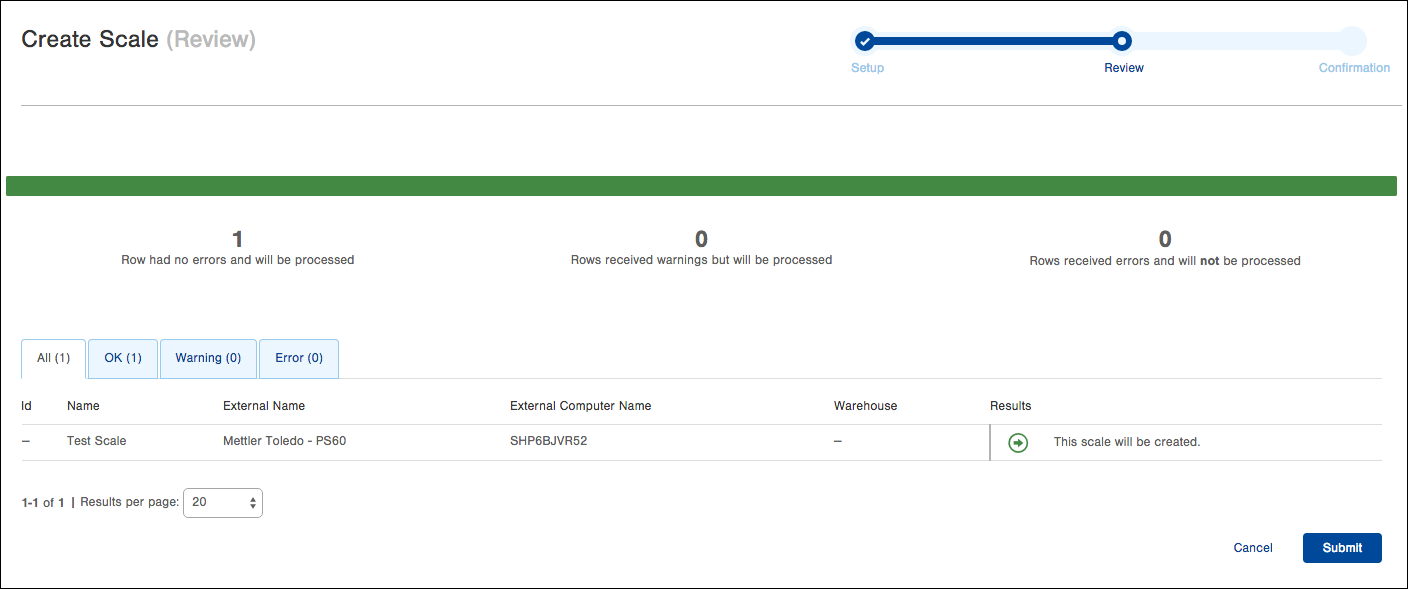
Click Next. The Review step in the process appears.
-
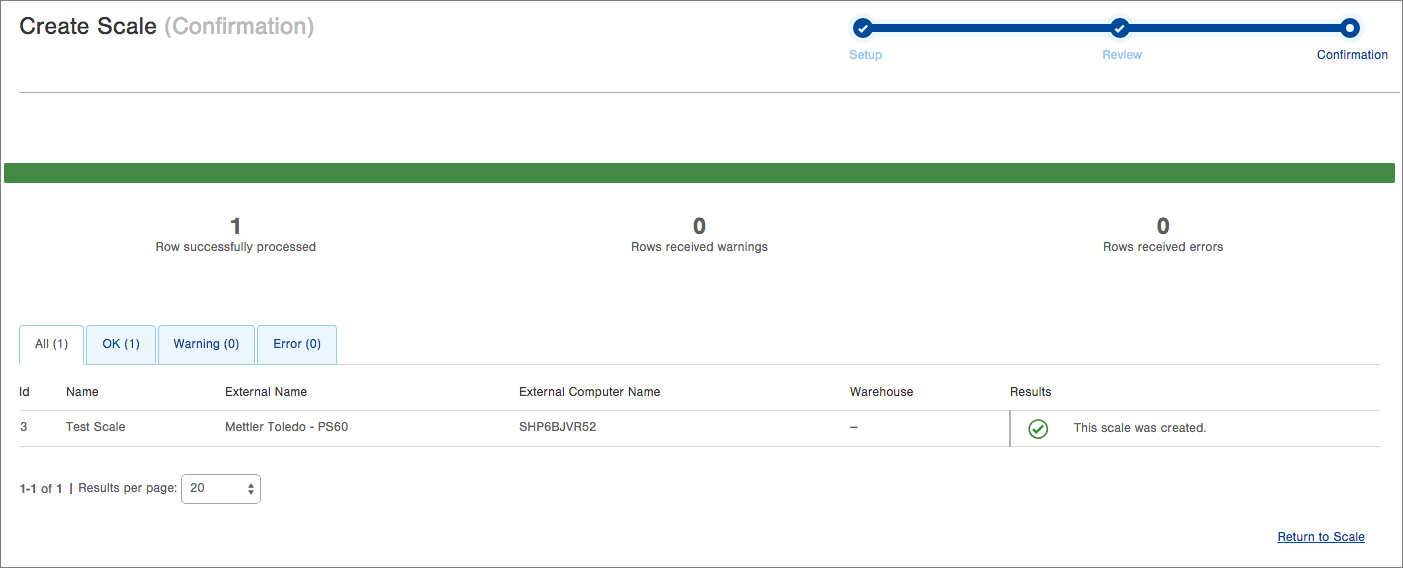
If no errors or warnings occurred in the Setup step, click Submit. The Confirmation step in the process appears.
-
The Scale was created and now displays in the "Scale" table. If you would like to test the scale, see the section below.
This step made the Scale available from this computer in Infoplus, but it is not yet setup for use when shipping. To setup the computer to detect the scale when shipping, Turn on Scale Settings in your User Profile.
Test the Scale
-
Access the "Scale" table. Two ways:
From the Dashboard: Click the “Warehouse Operations” tab, click the “Equipment Setup” App, then click the “Scale” Table.
From the Quick Actions shortcut: Press a dot (period) on your keyboard, then select "Scale” from the list of Quick Actions. -
Click the checkbox next to the scale you want to test.
-
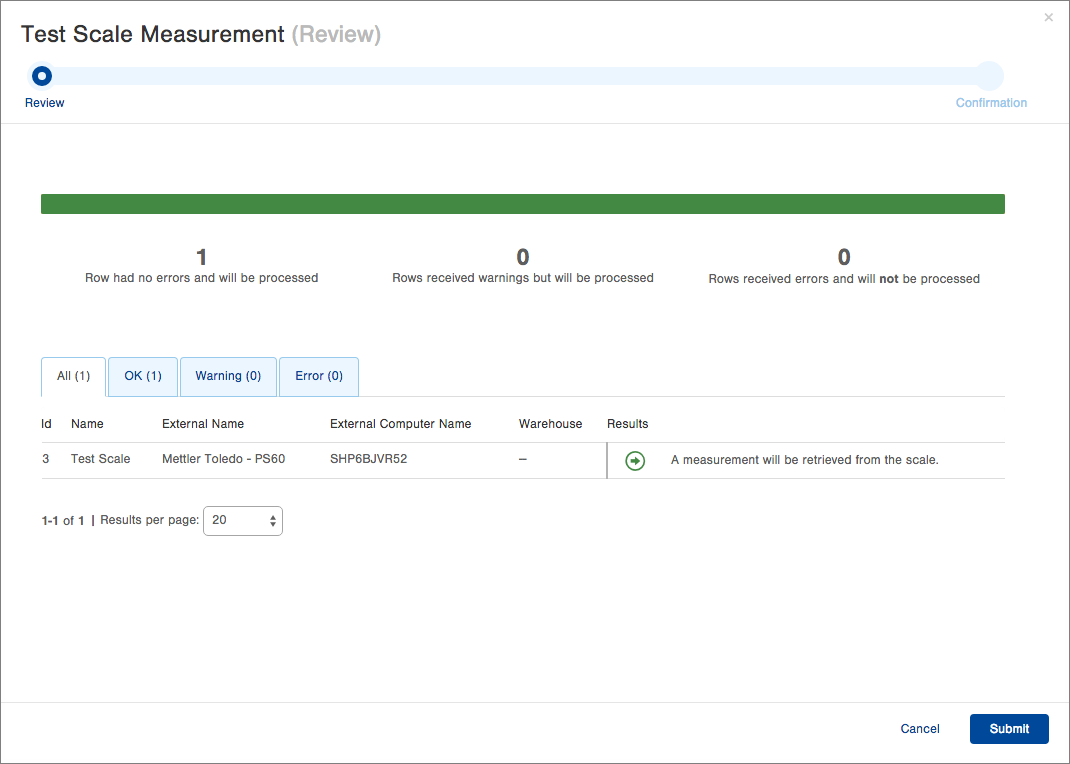
Click the Actions menu, and select Test Scale Measurement. The Review step of the "Test Scale Measurement" process appears.
-
Review the planned results, and then click Submit. A measurement will be sent from the scale to Infoplus. The Confirmation step in the process appears.
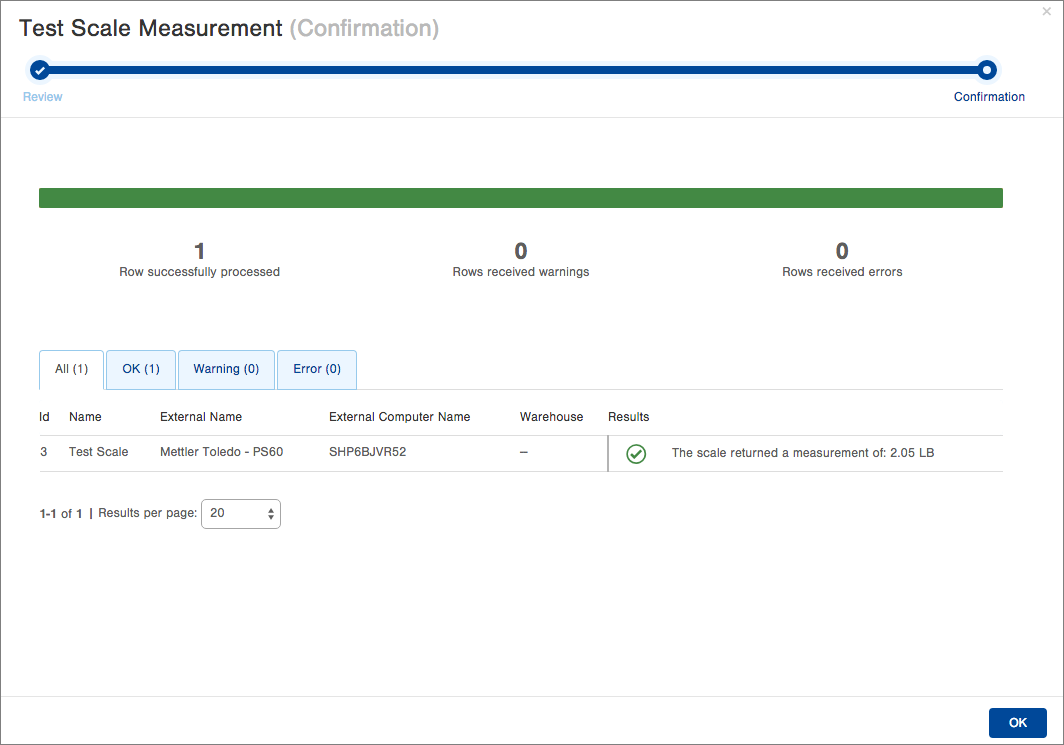
NOTE: If the test did not work, confirm Infoplus LocalConnect is running. Also check the scale setup in the Scale table in Infoplus.
Click OK. You will return to the "Scale" table. Scale setup is complete, but to tell Infoplus to use the scale when shipping, you must Turn On Scale Settings in your User Profile.
Troubleshooting
Q: I have a scale attached and showing in Infoplus LocalConnect and the Print Node server, but I can't add it in Infoplus.
A: Make sure the computer name hasn't recently been changed. Make sure LocalConnect is showing the correct name of the computer. Re-add the connection within the Infoplus LocalConnect App and try the steps in this article again.
Q. I needed to clear the browser cache on the computer that I use for Infoplus. Now my Scale is not working.A: Follow the following steps -
- In Infoplus, press "." and in the Quick Actions Search Tool, type "Scale".
- In the list of scales, locate the non-functional scale and delete it.
- Click Save.
- Click Create New and add the scale back into the Scale table.
- Click Save.
