Learn how to set up and print various important warehouse documents such as packing skips, OAGs, and fulfillment summaries.
Warehouse Documents provide package details to the customer and order-packing assistance to warehouse personnel.
Warehouse Documents include:
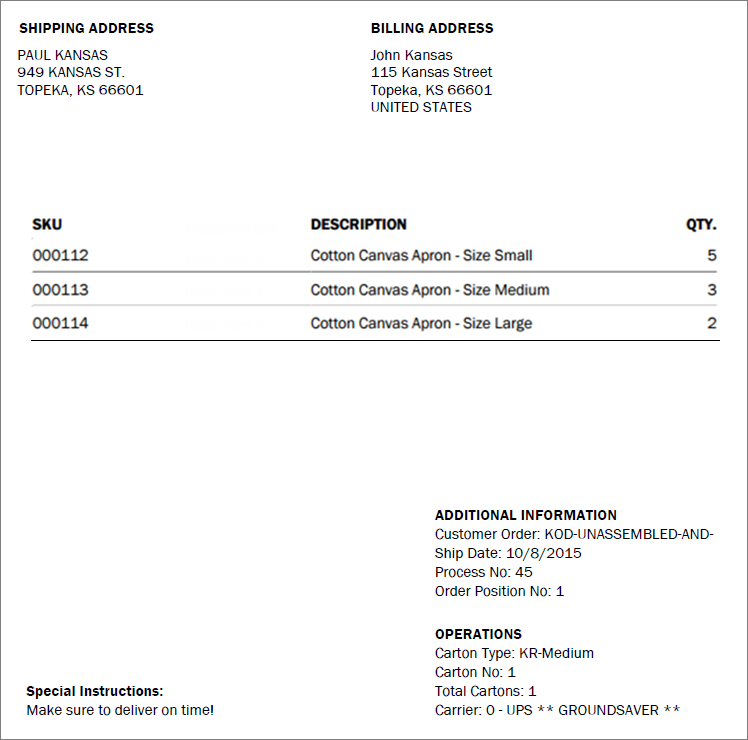
- Packing Slip: Document that accompanies the delivered package to the customer listing items in the package (Sample Packing Slip Seen Below)
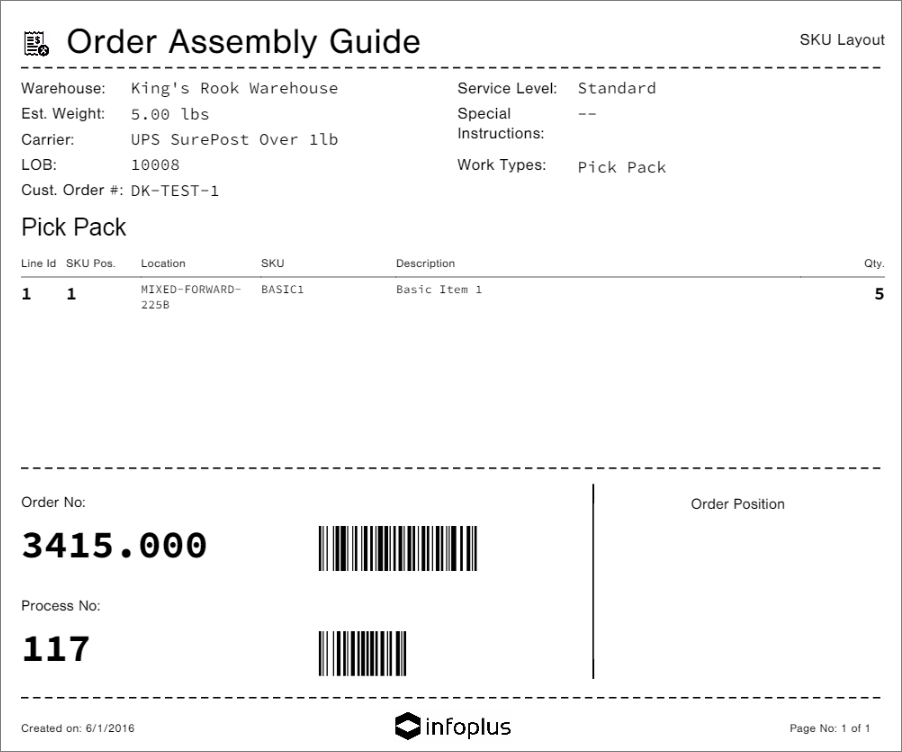
- Order Assembly Guide (OAG): Document which assists warehouse personnel when packing orders (Sample OAG Seen Below).
NOTE: OAG is not meant to be used for picking from locations, it is a guidance document that assists warehouse personnel when packing orders. For picking locations, click here
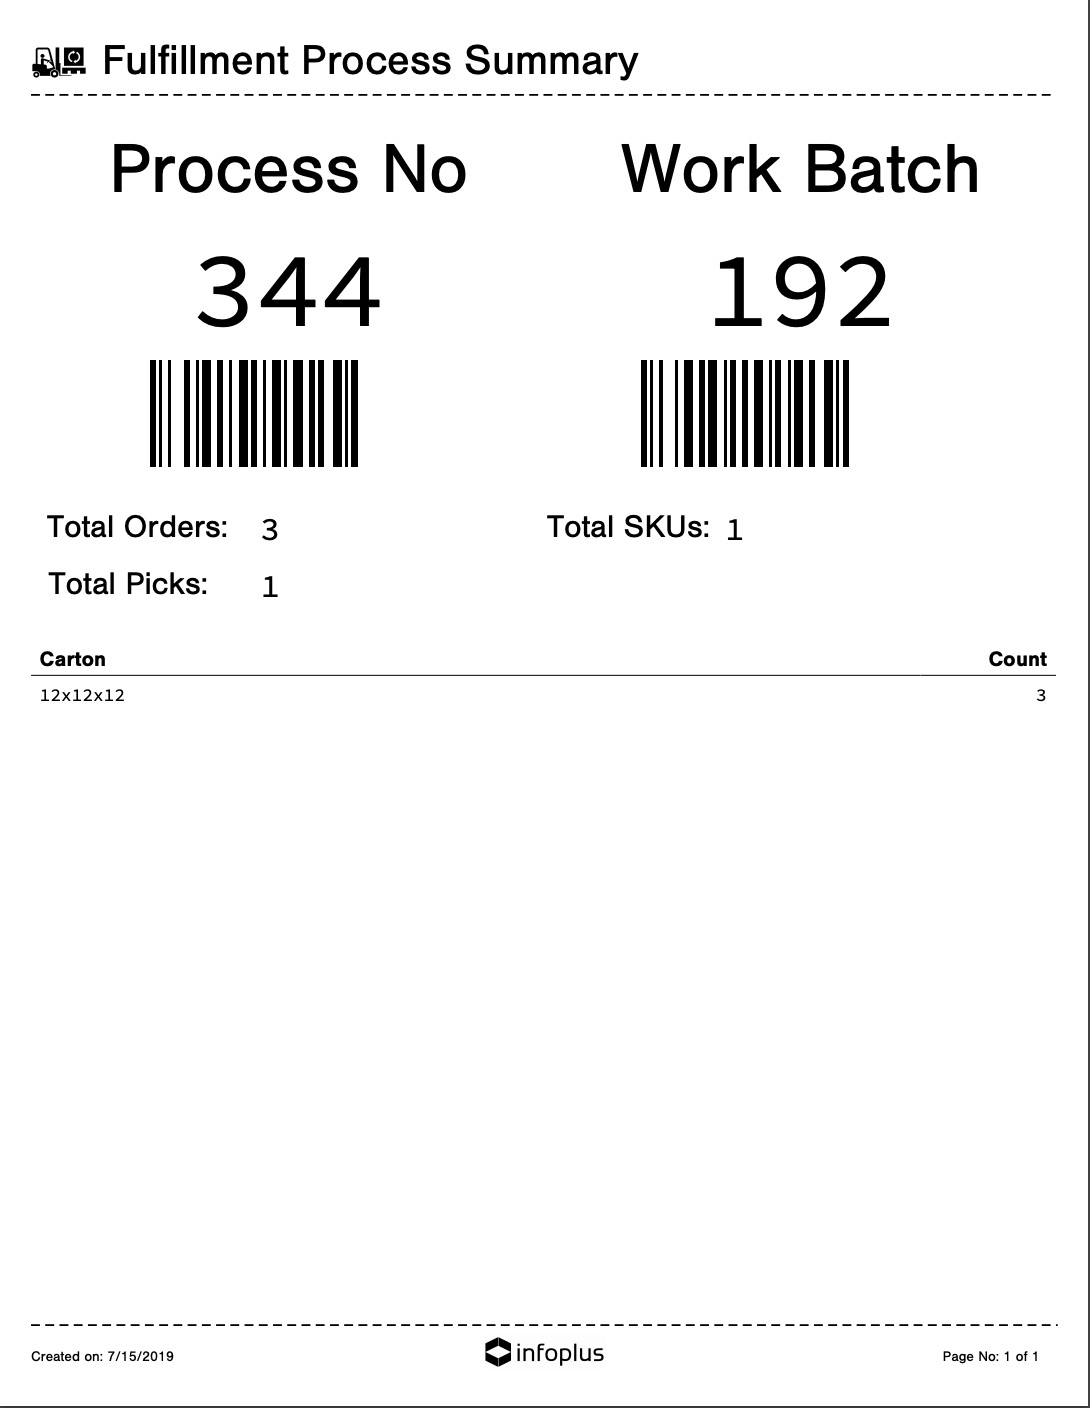
- Fulfillment Process Summary: Document is automatically produced when running fulfillment. This Fulfillment Process Summary Document contains the process number and work batch number along with barcodes for each of these fields. The document also contains the total orders, SKUs, picks, and also a full list of the cartons needed for the process (if running pre-cartonization). (Sample FPS Seen Below)
To generate warehouse documents for an order, the order must be fulfilled, meaning it has gone through the allocation, and pick, pack, ship processes. See Fulfillment Process Overview for more information.
You can create Warehouse Documents:
- When fulfilling orders using the Run Fulfillment process.
- Using the Warehouse Documents report (steps below)
Create/Print Warehouse Documents
- Access the “Order” table. Two ways:
- From the Dashboard: Click the “Account Management” tab, click the “Order” App, then click the “Order” Table.
- From the Quick Actions shortcut: Press a dot (period) on your keyboard, then select “Order” from the list of Quick Actions.
NOTE: You can also access Warehouse Documents reports directly by pressing the dot (.) on your keyboard and selecting "Warehouse Documents". You will be taken to the "Order" table to select orders. A Next button will display to continue through the process starting from Step 4 below.
- Click the checkbox next to each order for which you want to create warehouse documents.
- NOTE: You can select all records that are displayed (i.e., after performing a search to display only the orders you want) by clicking the checkbox in the upper left corner. Only the records on the current page will be selected, but a link at the top of the window allows you to select all records.
- NOTE: You can select all records that are displayed (i.e., after performing a search to display only the orders you want) by clicking the checkbox in the upper left corner. Only the records on the current page will be selected, but a link at the top of the window allows you to select all records.
- Click the Actions button and select Warehouse Documents.
Here is a screenshot from the Setup step.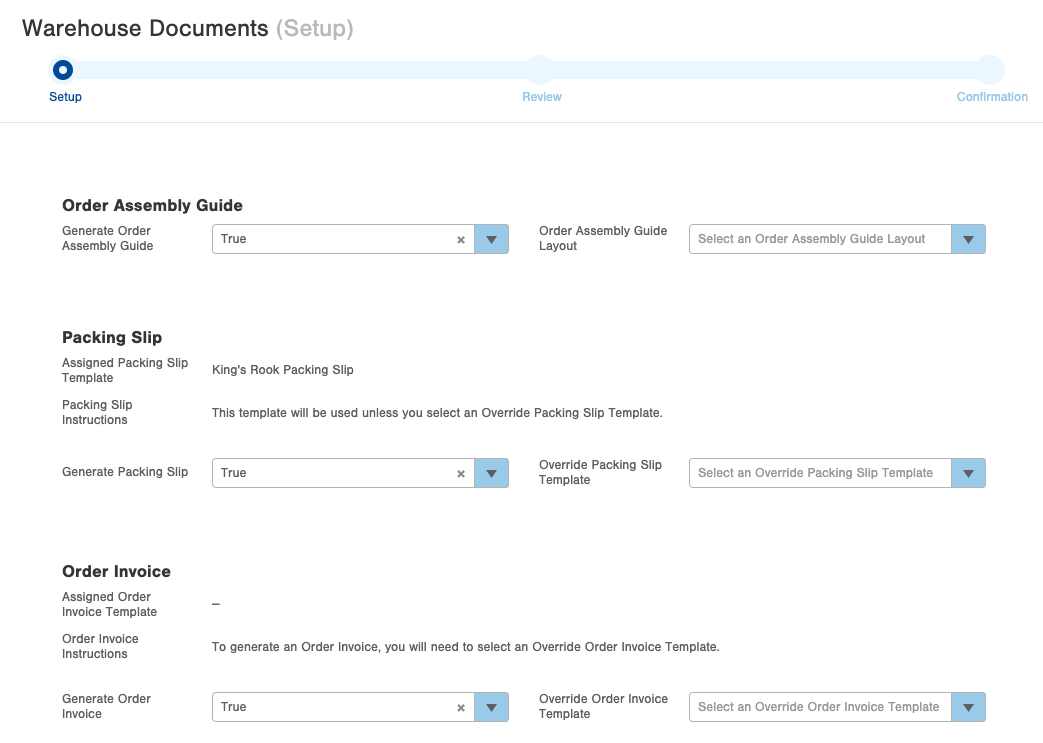
-
Under the Order Assembly Guide section, select Generate Order Assembly Guide True or False. Selecting True will create the Order Assembly Guide for each order selected. You can also choose which Order Assembly Guide Layout to use (e.g., 4x6, 4x8, or 8.5x11). The default Layout is the 8.5x11 (full page).
-
Under the Packing Slip section, you will be shown what Packing Slip Template(s) are assigned to the Order(s) you have selected. You will also see a line of instructions. Select Generate Packing Slip select True or False. Selecting True will create the Packing Slip for each order selected. You can also select an Override Packing Slip Template, which, if selected, will be the template used for all orders, overriding the assigned template. Note that if your order(s) do not have a packing slip template assigned, you must choose an Override Packing Slip Template if you wish to generate packing slips.
-
Under the Order Invoice section, you will be shown what Order Invoice Template(s) are assigned to the Order(s) you have selected. You will also see a line of instructions. Select Generate Order Invoice select True or False. Selecting True will create the Order Invoice for each order selected. You can also select an Override Order Invoice Template, which, if selected, will be the template used for all orders, overriding the assigned template. Note that if your order(s) do not have an order invoice template assigned, you must choose an Override Order Invoice Template if you wish to generate order invoices.
-
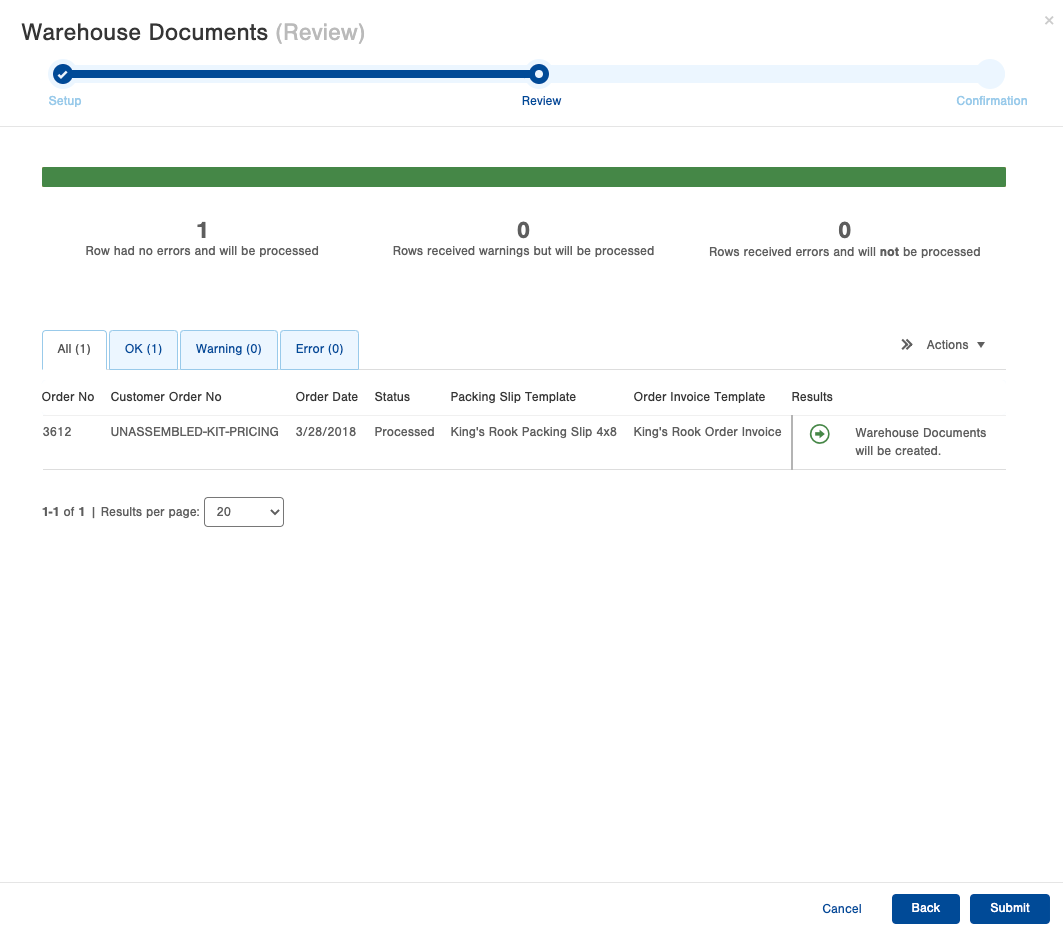
Click Next. Infoplus will check the orders to confirm warehouse documents can be created. The Review step will appear.
-
Review the results.
-
NOTE: If any of the selected orders receive an error (i.e., if you didn't select a Packing Slip template and a selected order didn't have one assigned, or if you tried to print documents for an order that wasn't yet processed), those orders will not produce documents, however orders which do not have errors will have documents created. If you need to, you can go back to adjust your settings.
-
-
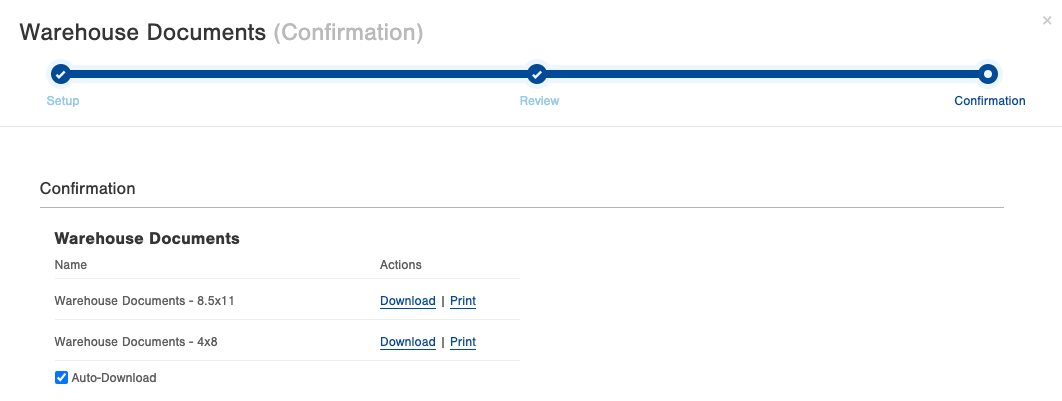
For orders where warehouse documents can be created, click Submit. The Confirmation step will appear.
-
Click Download links to download the documents. One PDF file will be created with all of the selected orders' documents at each page size that was selected. Or, click the Print link to have the document sent directly to a printer that you have configured in Infoplus. See Auto Print for details on setting up this feature.
Also, if you want to automatically have the documents opened in a new browser tab when they are generated, you can click the Auto-Download checkbox - then, when you run this process in the future, the documents will automatically be opened for you.
In addition, the documents for each Order will be saved in the "Warehouse Documents" section of that Order's record. They will display in the order record similar to this: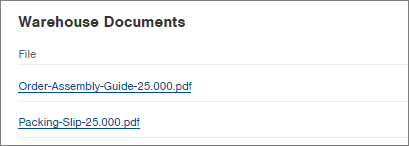
View Sample Warehouse Documents
Sample Packing Slip (yours may be formatted differently depending upon the template you have setup):
 Sample Order Invoice (yours may be formatted differently depending upon the template you have setup):
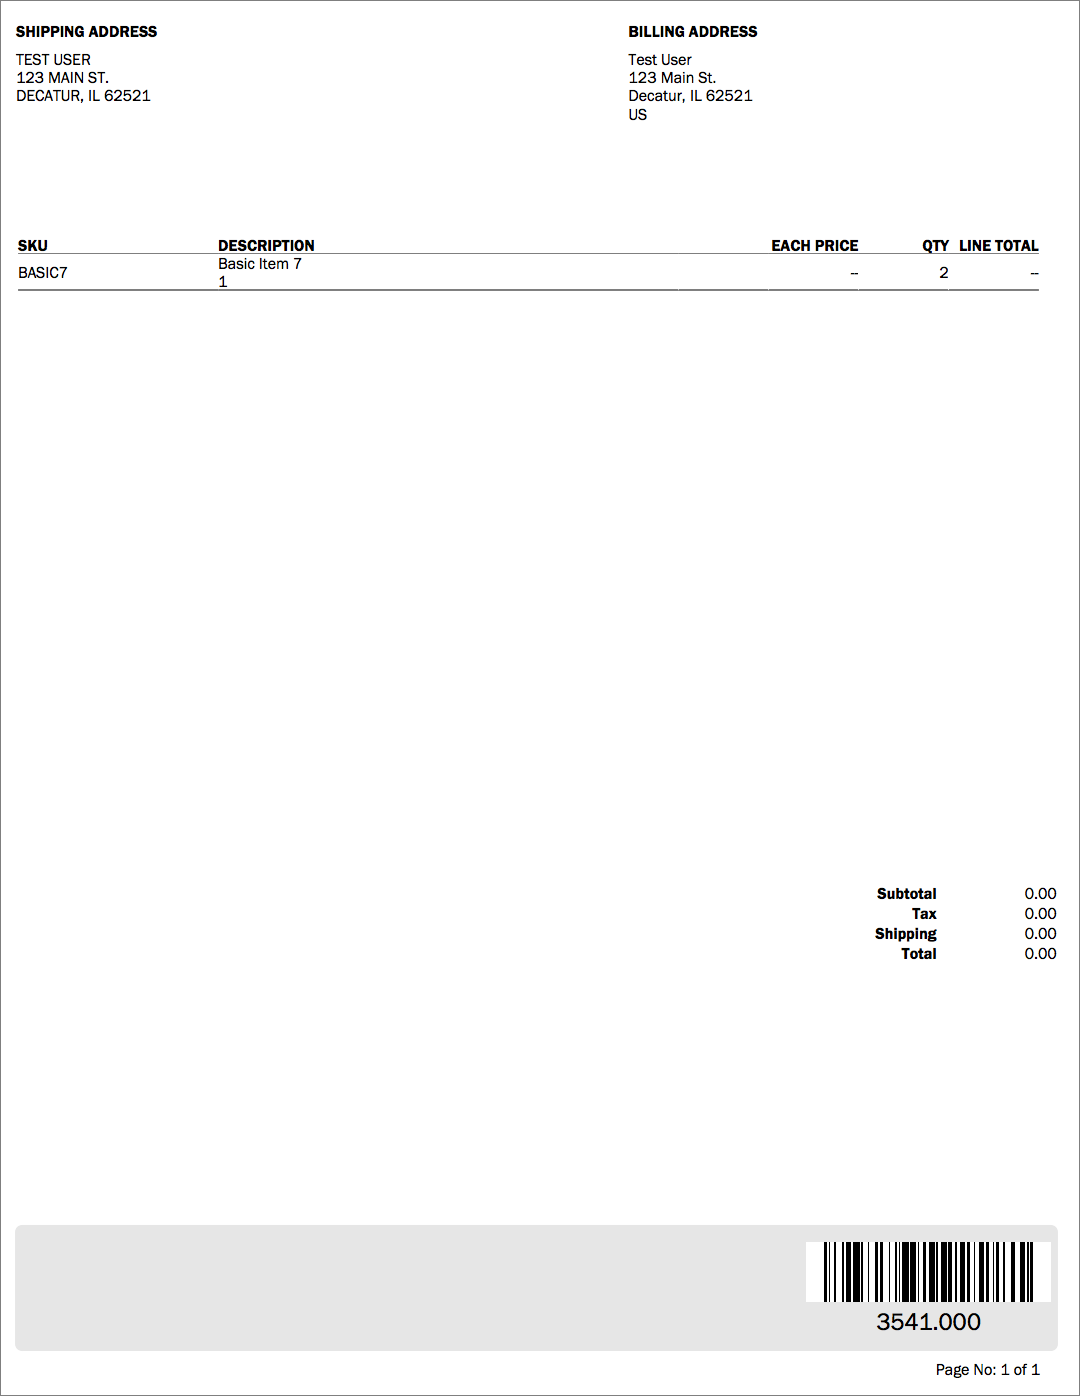
Sample Order Assembly Guide
Sample Fulfillment Process Summary
Troubleshooting Warehouse Documents
Order Assembly Guides:
Use Case:
Why is my OAG showing an Item Description in my SKU field? 
Solution:
The SKU field in the OAG is controlled by the Warehouse Display Field. Verify what your Warehouse Display Field should be displaying and go to the Item table to verify what is in that field.
Example:
2 oz. Hand Sanitizer is a Custom Field called Mobile App Item Description Warehouse Display Field is set to display Custom Field>Mobile App Item Description. Therefore, 2 oz. Hand Sanitizer is displayed instead of HANDSAN2OZ. To change this, you can edit the Custom Field to have the SKU name or change the Warehouse Display Field to SKU