Select Allocation Only when running a Fulfillment Plan if you want to allocate inventory, but not pick, pack, and ship them yet.
If you want to Allocate Inventory to one or more orders, but you are not yet ready to complete the Pick, Pack, Ship processes, choose "Allocation Only" when fulfilling orders. For example, if you have someone outside of the warehouse area verify a particular order is processing as expected, and someone else generates the Pick, Pack, Ship work associated with the process.
Allocate Inventory to Order(s) without running Pick, Pack, Ship Processes
-
If you are selecting the orders to be allocated from the Orders Table (as opposed to using an Order smart filter), begin at Step 2.
If you are selecting orders to be allocated using an Order Smart Filter (which would need to already be created), press the dot (.) on your keyboard and select "Run Fulfillment" from the list of Quick Actions. Then jump to Step 5. See Create/Manage Smart Filters for information on creating smart filters. - Access the “Order” table. Two ways
- From the Dashboard: Click the “Account Management” tab, click the “Order” App, then click the “Order” Table.
- From the Quick Actions shortcut: Press a dot (period) on your keyboard, then select “Order” from the list of Quick Actions. - Click the checkbox next to each order you want to fulfill. (You can only fulfill orders in a status of "On Order".)
NOTE: To select all records that are displayed (i.e., after performing a search to display only orders to be fulfilled) click the checkbox in the upper left corner. Only the records on the current page will be selected, but a link at the top of the window allows you to select all records. - Click the Action button and select Run Fulfillment. The "Fulfillment Type" step in the process will appear.
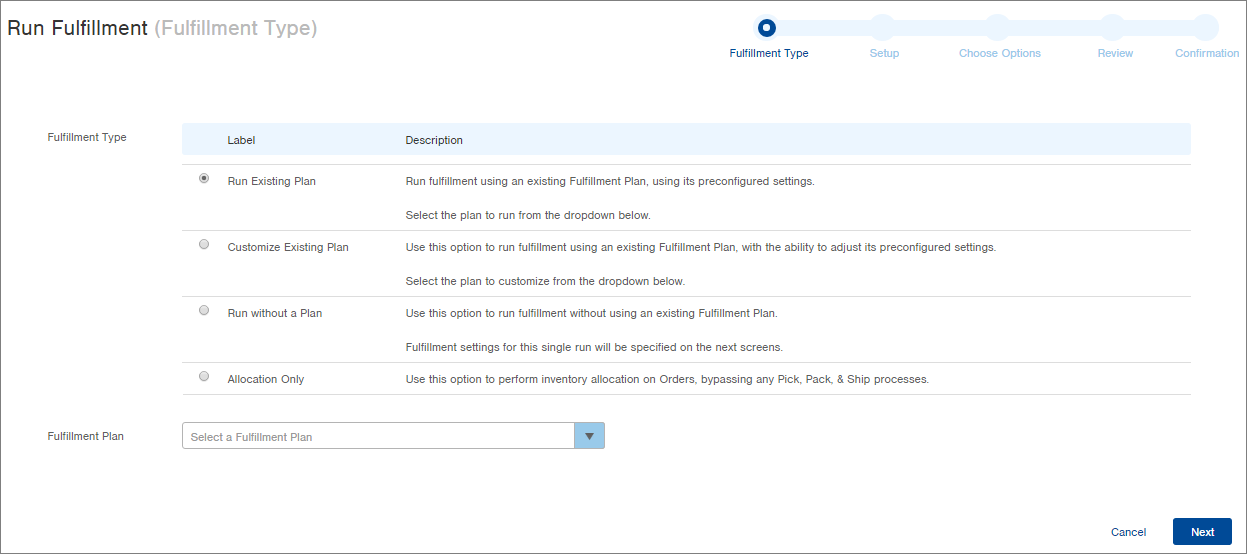
-
Select the Allocation Only. For information on the other Fulfillment Types, see Run Fulfillment.
- Click Next. The Setup step in the process appears.
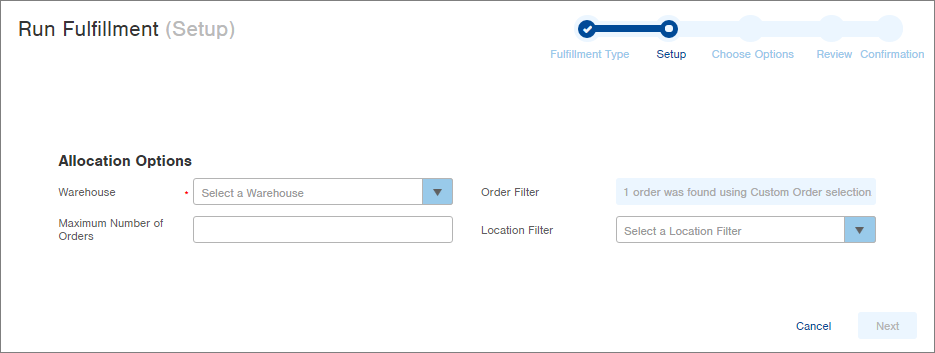
- Select the Warehouse from which inventory will be allocated.
-
If you selected orders when you begin the fulfillment process, the Order Smart Filter field will be unavailable and will indicate how many orders were selected (shown in screenshot above).
If you began the fulfillment process from the process itself (and not from the Orders table) that means you have an Order Smart Filter created that indicates which orders are to be fulfilled. Select the Order Smart Filter here. -
If applicable, enter a Maximum Number of Orders (i.e., if the availability of your warehouse's employees and/or space limits the number of orders to be fulfilled to 25).
-
If applicable, select a Location Smart Filter (i.e., if you only want to fulfill orders in a particular zone, you would need to have created a smart filter in the "Location" table to only show that zone's locations; and you could select it here.)
-
Click Next. Infoplus will review allocation requirements for the selected orders (i.e., confirming available inventory). The Review step in the process appears.
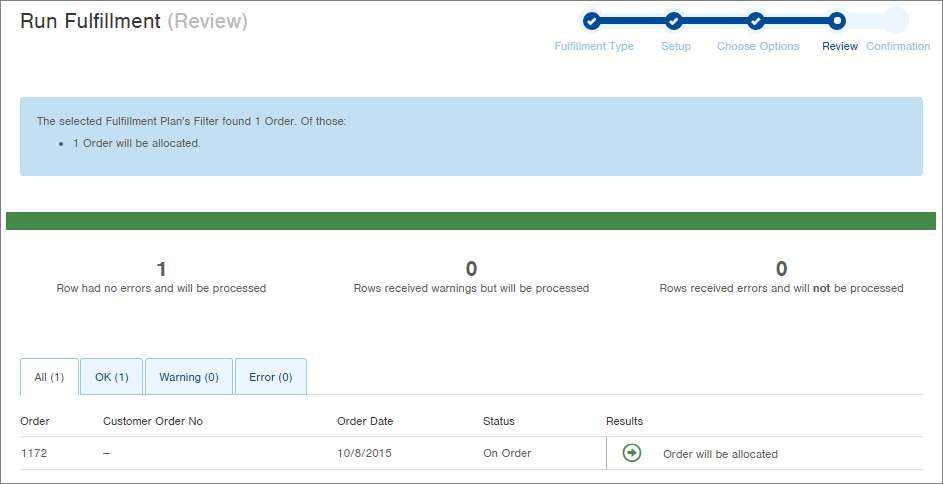
-
Review the planned results.
- To continue with the allocation, click Submit. Orders able to be allocated with be processed. The Confirmation screen will appear.
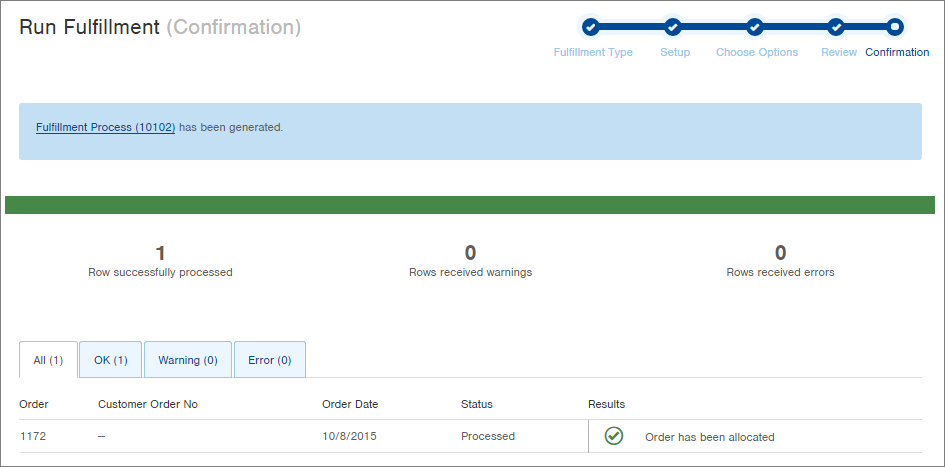
-
To review the Fulfillment Process, click the link at the top of the window. If you need to perform Pick, Pack, Ship processes on this fulfillment process, see Run Pick, Pack, Ship for more information.
NOTE: From within the Fulfillment Process record, you can also Cancel the Fulfillment Process.
