Access the User Table in Infoplus to manage, edit, and create accounts each with unique permissions for your Infoplus application.
If you have permission to do so, you can create Users in Infoplus. Assign users to roles containing a preset of permissions. Once created, the user will receive an email with login instructions.
How to Create a User
- Access the User Table by pressing the dot (period) on your keyboard and selecting User from the Quick Actions drop-down list.
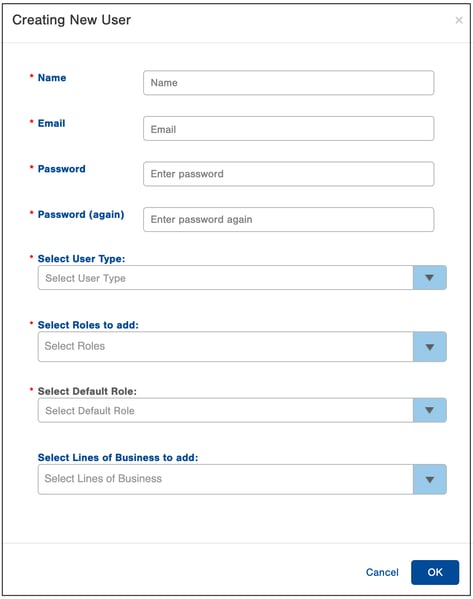
- Click the Create New button in the top right. The Create New User window appears:
-
Type the full name of the user into the Name field.
-
Enter the user's Email address. This will also be the user's username when logging into Infoplus.
-
Enter a Password for the user.
NOTE: After user creation, the user will receive a welcome email and be required to change his/her password. -
Enter the Password again.
- Select the User Type that will be using the Account.
"3PL Admin" is used for members of the 3PL organization.
"3PL Customer" is for the Client of the 3PL. -
Select the Role(s) to add the user to.
-
Select a Role to be the user's Default Role.
-
Select the Lines of Business that the user should have access to.
-
Click OK. The User will appear in the User table. Here's a sample screenshot of the User table:
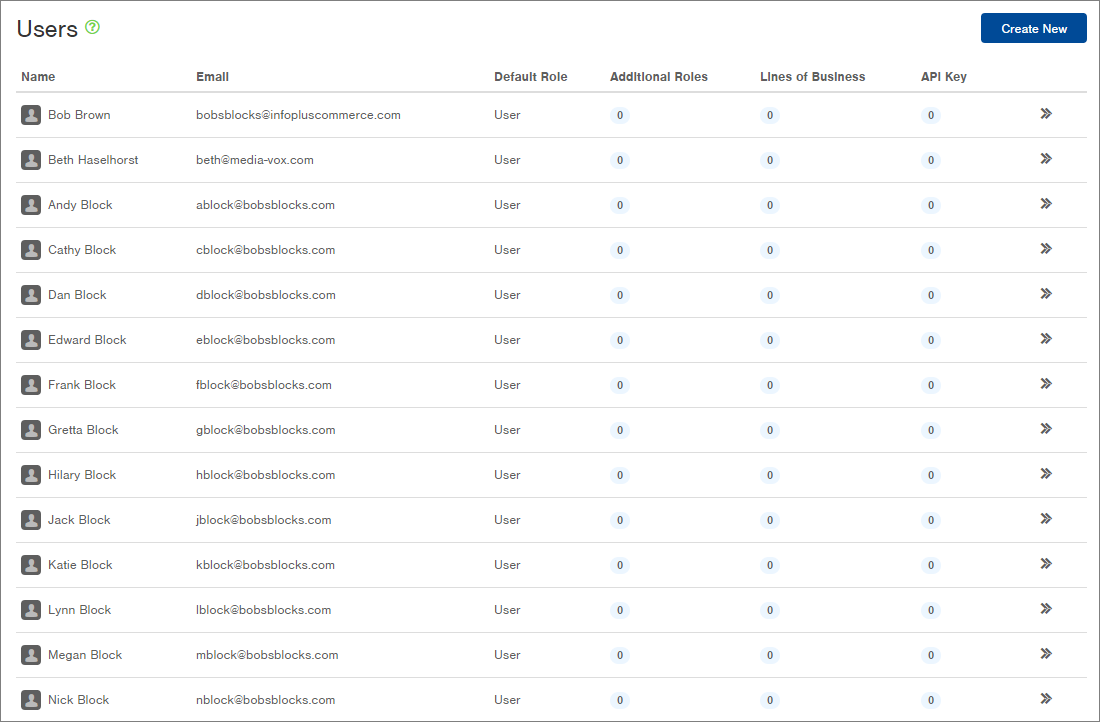
NOTE: The API Key column indicates if an Authorization API Key is associated with the user's account.
How to Edit a User's Name and/or Email Address
- Access the User table by pressing the dot (period) on your keyboard and selecting User from the Quick Actions drop-down list.
- Click the
 that appears at the end of the user's row that you want to edit.
 - Select Edit from the drop-down menu.
- Modify the Name and/or Email, and then click OK.
How to Delete a User
- Only a User with Administrator Level Access can delete another User.
- Before any User is deleted, any Smart Filters or Reports created by User being removed, must be shared with at least one other user. If these functions are not shared prior to deletion, these functions will need to be re-created by another user.
- Access the User table by pressing the dot (period) on your keyboard and selecting User from the Quick Actions drop-down list.
- Click the
 that appears at the end of the user's row that you want to edit.
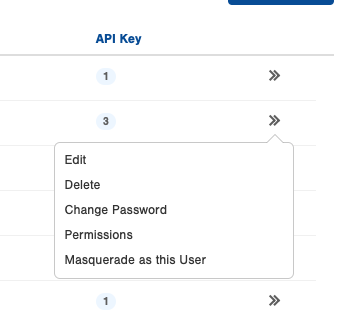
- Select Delete from the drop-down menu.
- Once a User is deleted, that User will be automatically removed from any LOB or roles associated.