Editing the receiving worksheet can make changes to items being processed into the warehouse.
Create / Edit Receiving Worksheet
The Receiving Worksheet is used to initiate the receiving process of items into the warehouse. The worksheet connects the Advanced Shipping Notification (ASN) to actual receipt of the items on the ASN, and is used to generate Put Away work tickets. (An ASN is sometimes referred to as a Purchase Order.)
Even if you aren't able to complete the receiving worksheet immediately, you can still begin the Receiving Worksheet and continue working on it later.
Create the Receiving Worksheet
- Go to the "Receiving Worksheet" Table. Two ways:
- From the Dashboard: click the "Warehouse Operations" Tab, click the "Receiving" App, then click the "Receiving Worksheet" Table.
- From the Quick Actions shortcut: Press a dot (.) on your keyboard, then select "Receiving Worksheet" from the list of Quick Actions.
NOTE: You can also begin creation of a Receiving Worksheet from within the ASN record by selecting "Create Receiving Worksheet" from the Next Steps section in the top right. To access an ASN record, press a dot (.) on your keyboard and select ASN for the list of Quick Actions. Go to step 4 below. - Click the Create New button. The Creating New Receiving Worksheet screen appears.
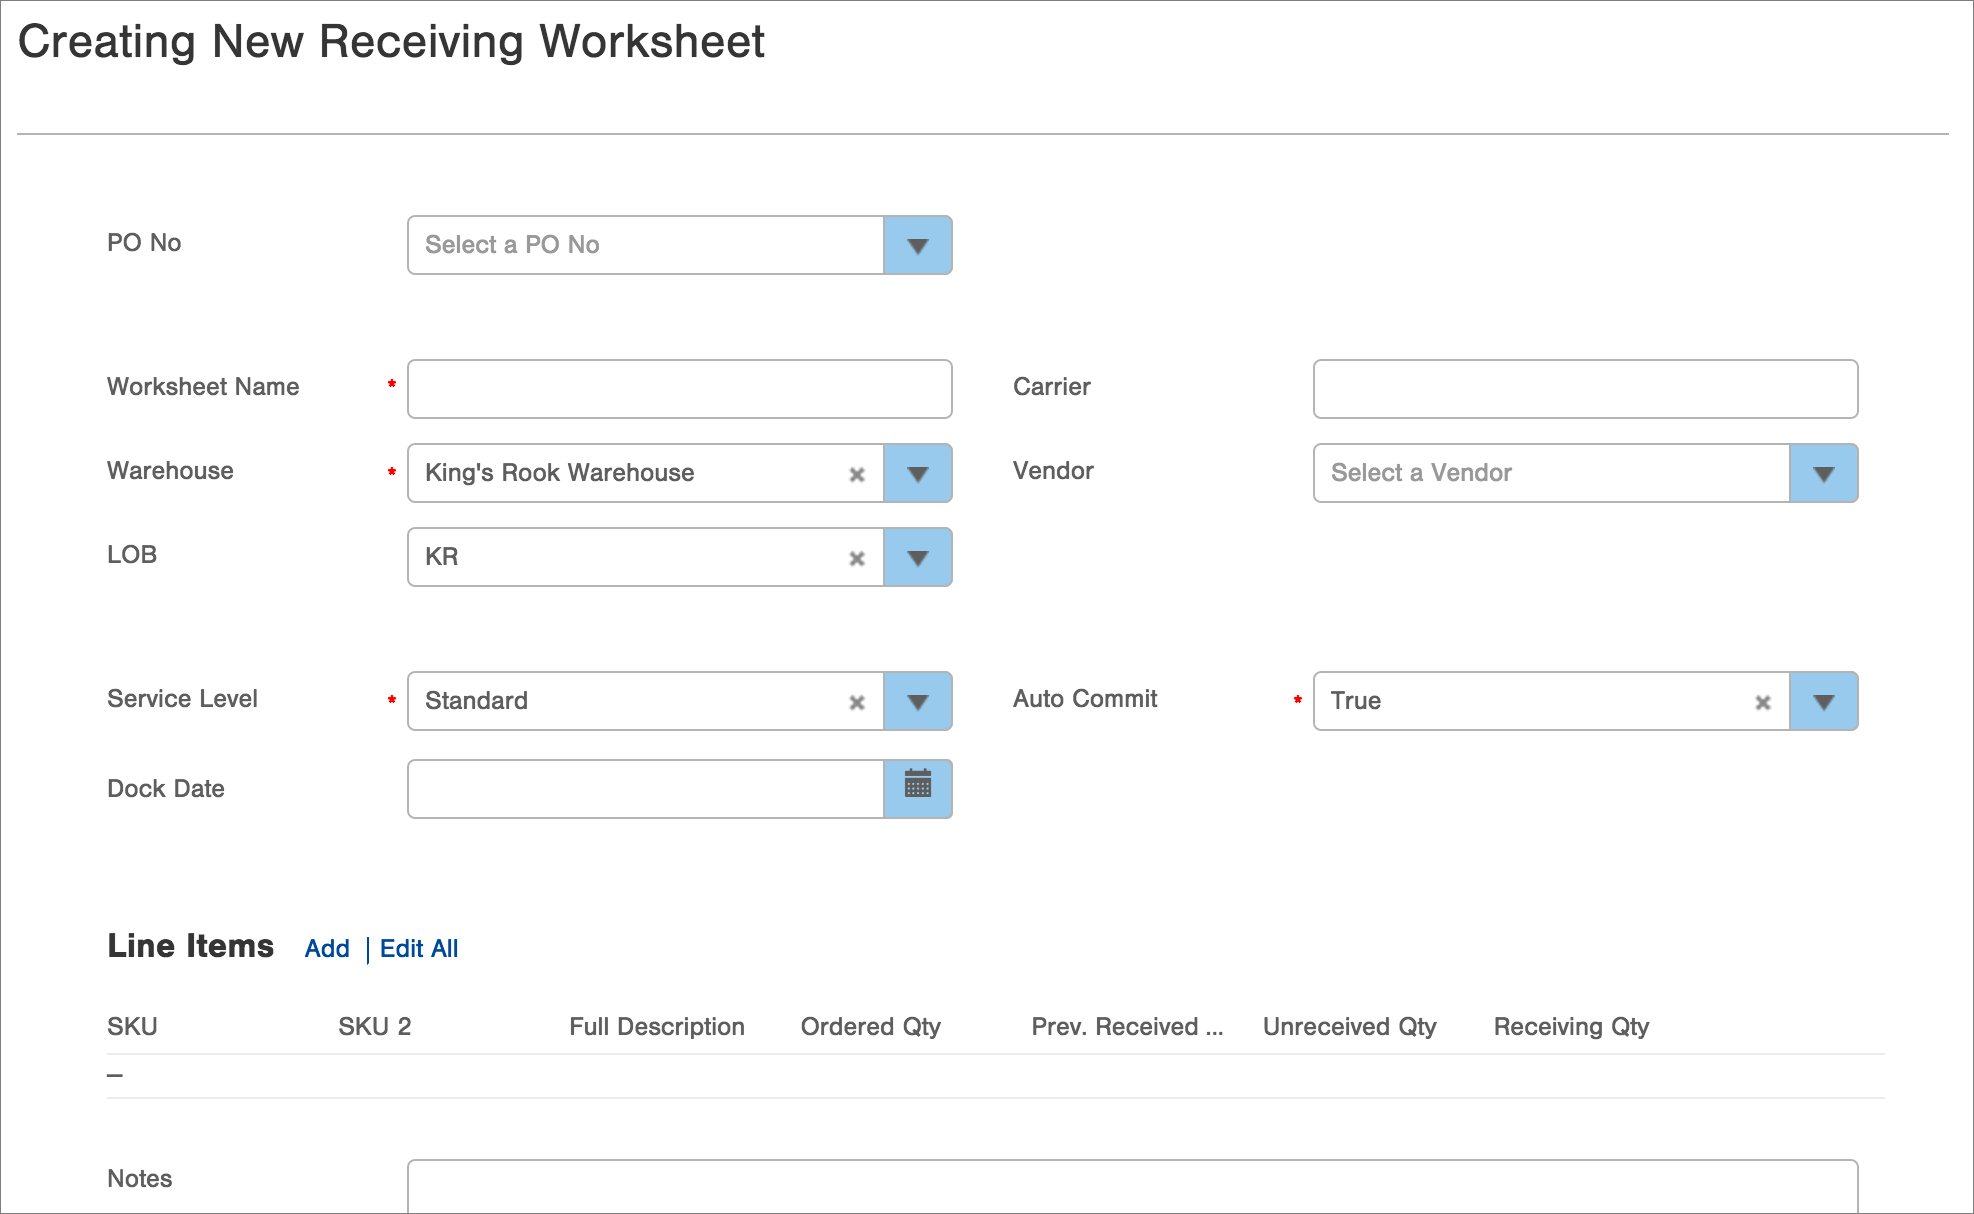
- Select the ASN for the items in the PO No field. You can begin typing the PO number to narrow the list of POs in the drop-down menu. Based on the PO selected, some fields in the worksheet will be completed for you (i.e., Warehouse, Vendor).
- A default Worksheet Name will appear based on the selected PO, but you can modify this name if needed.
NOTE: If you haven't selected a PO Number in the previous step, enter a relevant name for the worksheet so you can find it later once you are able to enter the PO number. - If not already completed, select the Warehouse and LOB (Line of Business), and Vendor if applicable.
- If applicable, enter Carrier information.
- In the Service Level fields, select whether this is a Standard or Rush receipt.
-
If it is part of your operating procedure to record when inventory arrives on your dock, enter the Dock Date. (Click the calendar icon to use an interactive calendar.) If not entered this date will default to the current date.
- In the Auto Commit field, select True or False. (Committing the receipt means the items are available for ordering.)
- Selecting "True" means Infoplus will automatically commit the receipt once items are put away.
- Selecting "False" requires someone to commit the receipt (this is done after items have been put away. - Add Line Items to the worksheet. In the Line Items section, click the Add link. The Select Item Receipt Records screen will appear showing items in the selected ASN. Here's an example:
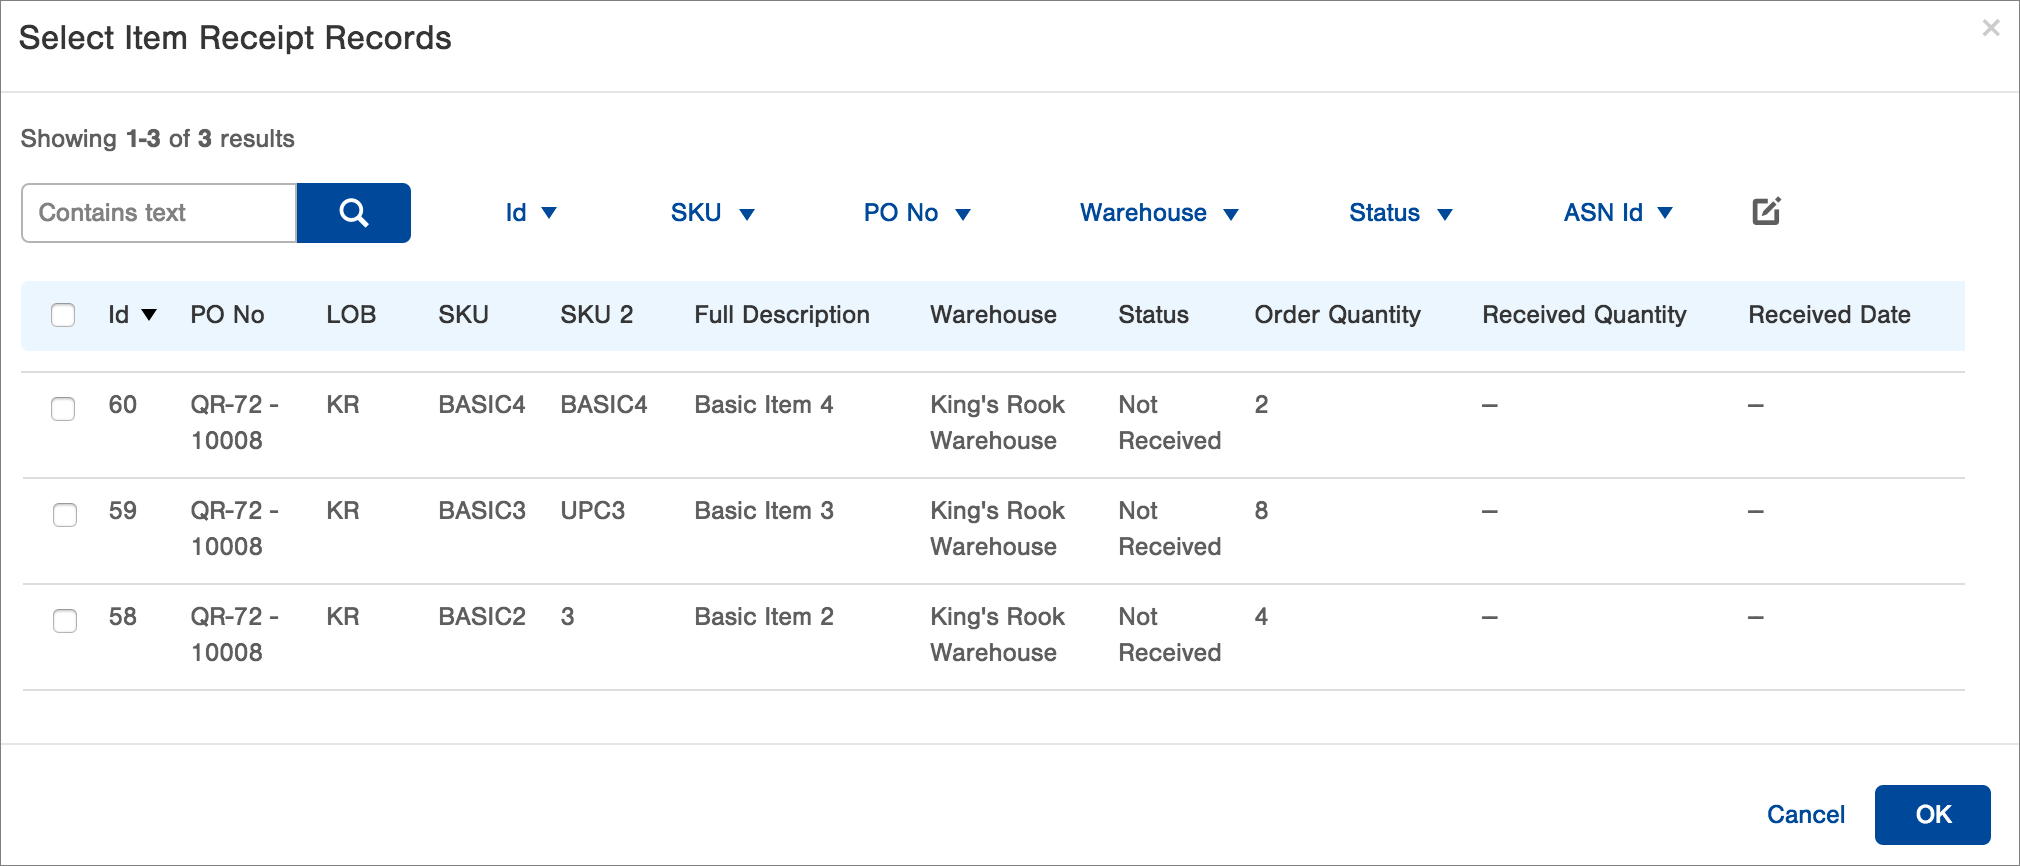
NOTE: If the Item record has a value in the Warehouse Display Field (Operations tab) that specifies a field other than SKU, the value in that field will appear in in the SKU 2 column. Otherwise, the SKU will appear in that column. -
Click the checkbox next to each item being received (You will enter quantity and weight information in the next step). After selecting all of the items being received, click OK. Here’s an example of how the Line Items section looks after Items have been selected:
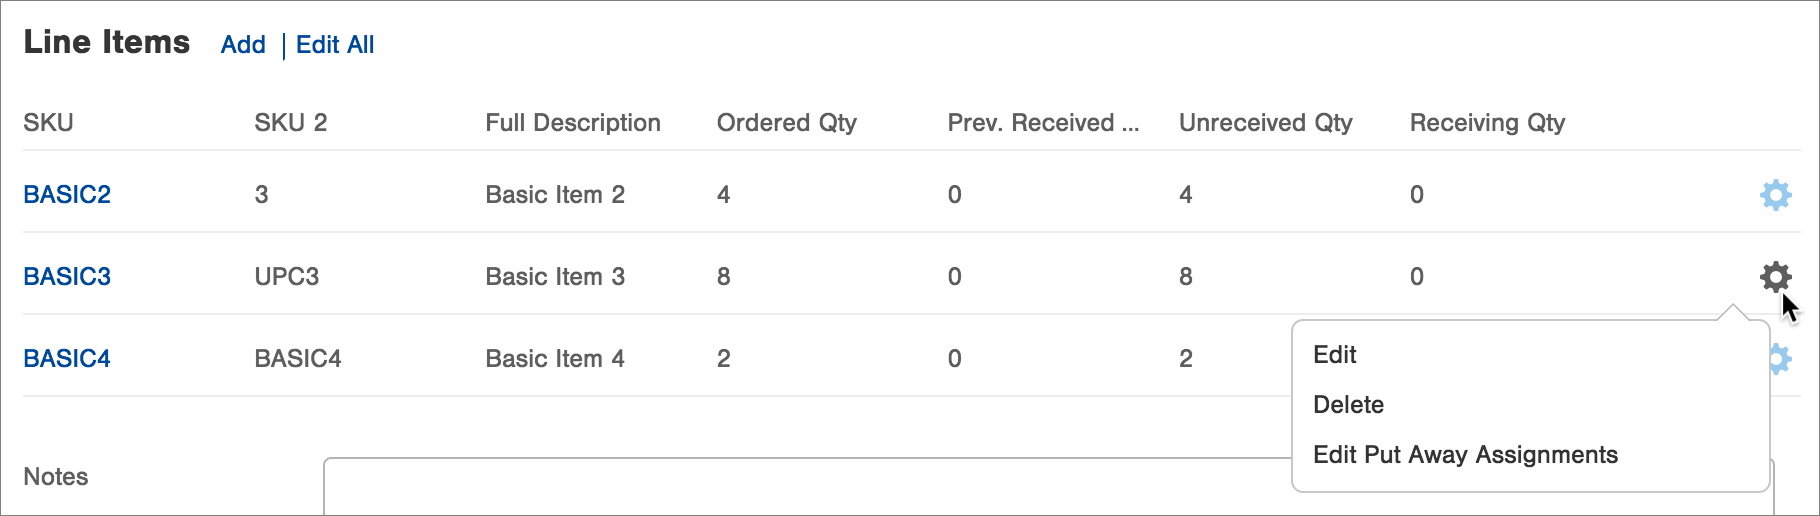
- Next, you need to add information for each line item, such as Receiving Quantity. You can do this one item at a time, or by using a table view showing all line items (for easier data entry):
- To edit one line item at a time, click the at the end of the item's row and select Edit. Here's an example of the Edit Line Item screen:
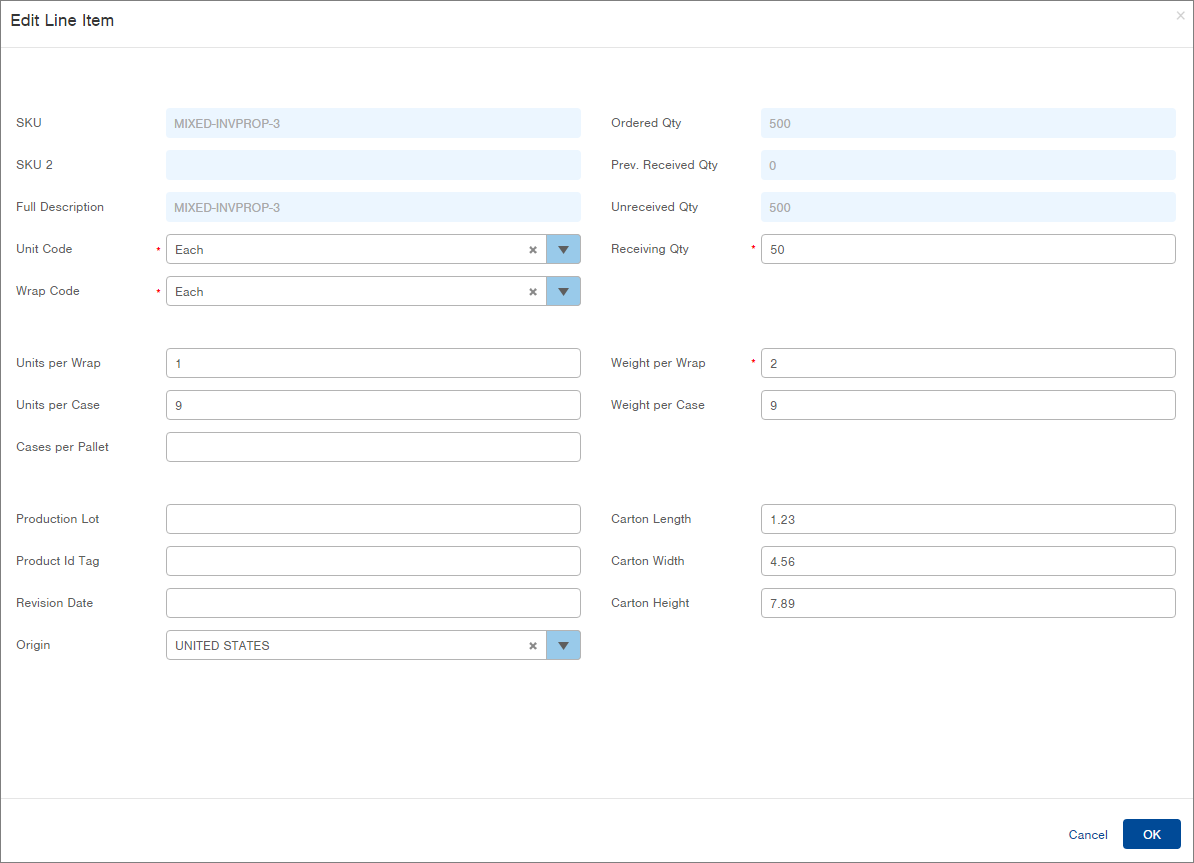 - To edit items using a table view, click the Edit All link in the Line Items section of the screen. Here's an example of the table view:
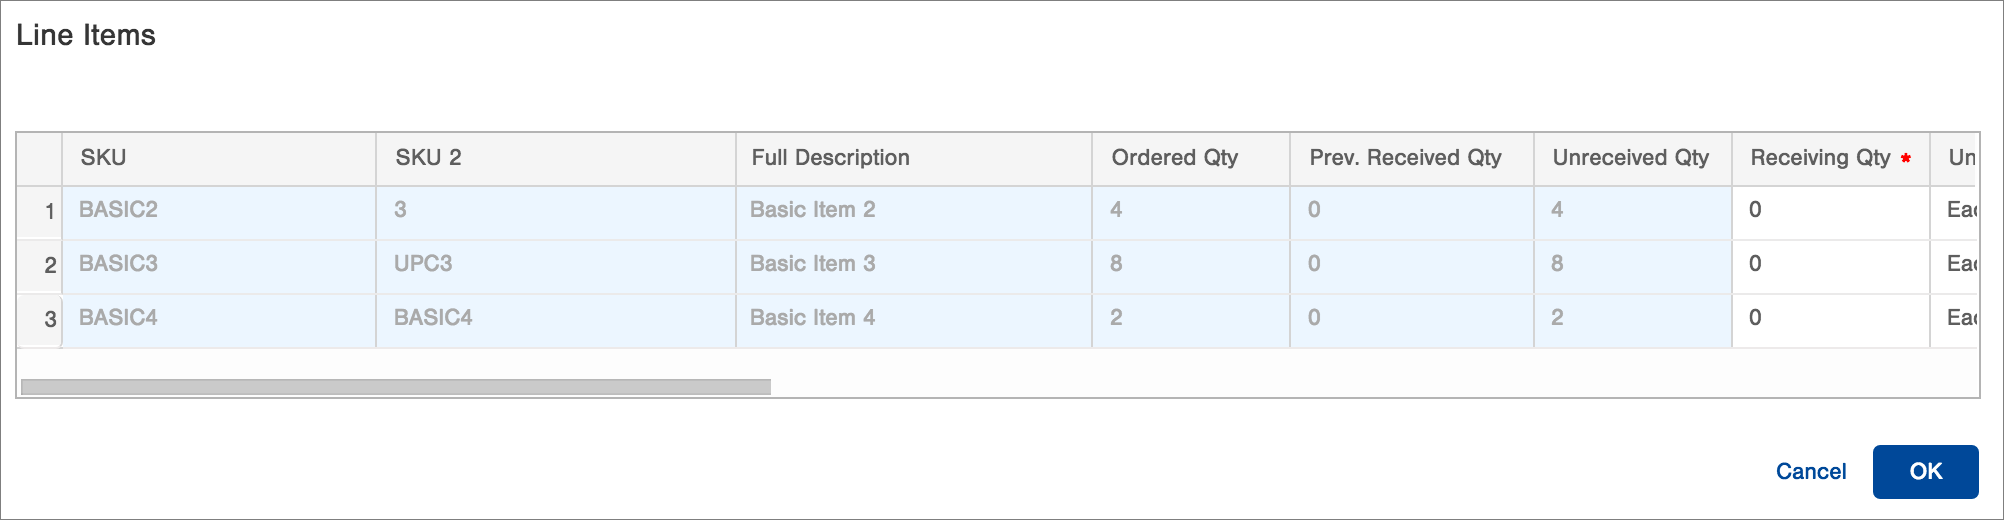
NOTES:
- You can sort the list of items by clicking on a column header. Click once for ascending, and again for descending. A triangle will appear to indicate the sort. Note that this sort will not be saved and is only to assist you with completion of this screen.
- The following Line Item fields will pre-fill based on the most recently "Received" Item Receipt for the same SKU: Units per Case, Weight per Wrap, Weight per Case, and Carton Length, Width, and Height. - Fill in the required fields (i.e., Receiving Qty) as well as any additional information, then click OK. (Your business practices will likely determine what information you should capture.)
NOTE: You can override pre-filled fields. - If you would like to create Put Away Assignments for any of the items (i.e., if a large receipt of an item doesn't fit on one pallet and you want to assign a quantity per pallet), click the
 next to the item and select Edit Put Away Assignments. The Edit Put Away Assignments screen will appear:
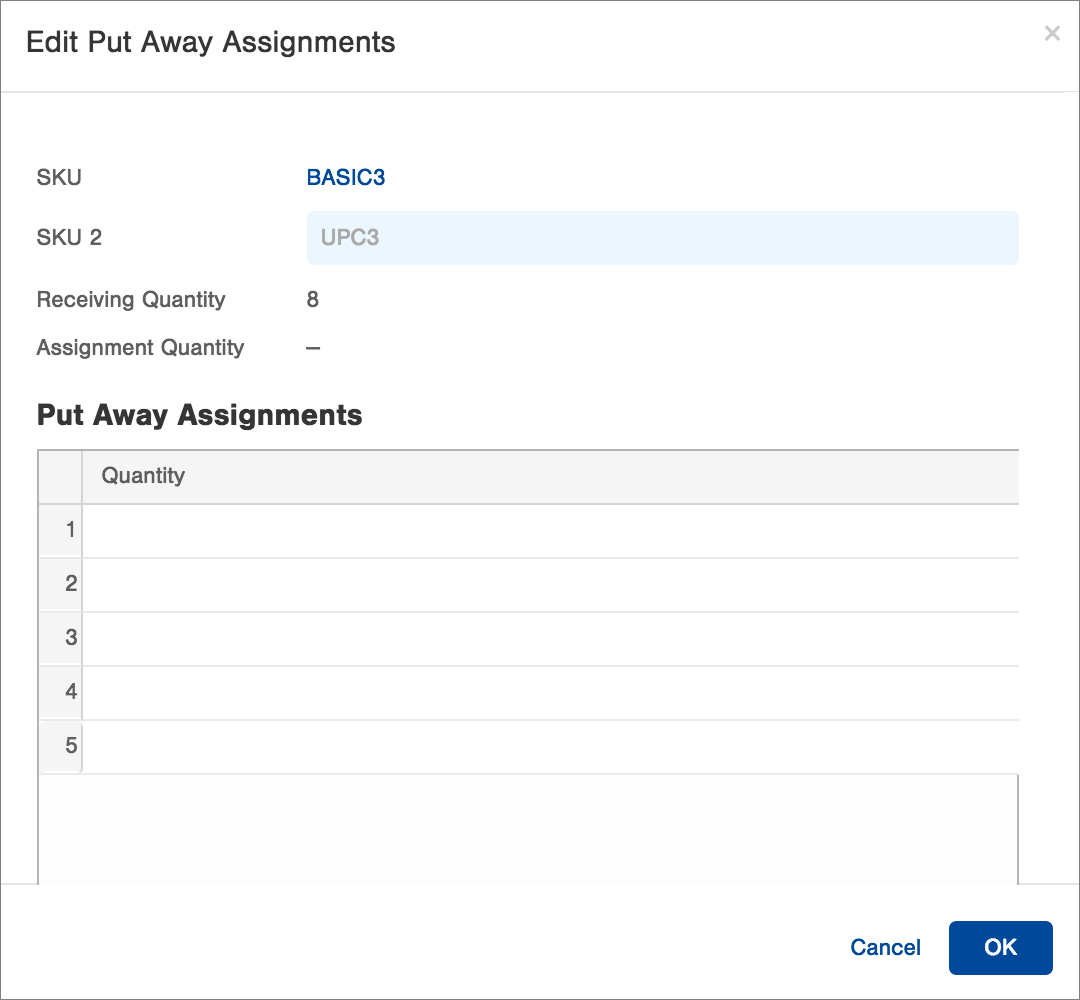
- The SKU, SKU 2, and Receiving Quantity fields appear at the top for information purposes.
- The Assignment Quantity field will fill in as you create the Put Away Assignments. When finished with the assignments, the Assignment Quantity and Receiving Quantity must match (meaning you are assigning put away work for the same quantity of items received).
- In the Quantity lines, enter the amount of the item to be put away for each assignment, pressing enter after typing each quantity. Additional lines will appear if needed. Here's an example: if you received 50 cartons of SKU1, and only 10 cartons can be put away on a pallet, type a quantity of 10 into 5 lines. Five Put Away work tickets will be created. Click OK when finished. -
When finished with the Receiving Worksheet, click Save.
-
After your Receiving Worksheet is saved and complete, you can perform next steps using the Actions button:
- Close the Receiving Worksheet (to begin the Receiving Process)
- Print the Receiving Worksheet
- Create a Vendor Compliance Survey (Optional)
- Go to the "Receiving Worksheet" Table. Two ways:
- From the Dashboard: click the "Warehouse Operations" Tab, click the "Receiving" App, then click the "Receiving Worksheet" Table.
- From the Quick Actions shortcut: Press a dot (.) on your keyboard, then select "Receiving Worksheet" from the list of Quick Actions. - Click on the Receiving Worksheet that you need to edit.
- Click the Edit button in the bottom right.
- Make the necessary edits.
- Click Save.
