This article will go over how Work Tickets are generated and how to print them.
Generate Work Tickets
"Work" gets created in Infoplus in a variety of ways. For example:
- When receiving items against an Advanced Shipping Notification (ASN), "Put Away" work is created to put the items into a location in the warehouse.
- When fulfilling orders, "Pick" work is created to pick the items for the order.
- When replenishing forward locations, "Pick" and "Put Away" work is created to pick items from storage locations and put into forward locations.
Work records display in the "Work" table. From that table, you can create work tickets (steps below) and cancel work.
NOTE: You can also often print work tickets directly from the process that generated the work. For example, you can print work tickets after creating a Fulfillment Process from the Fulfillment Process record.
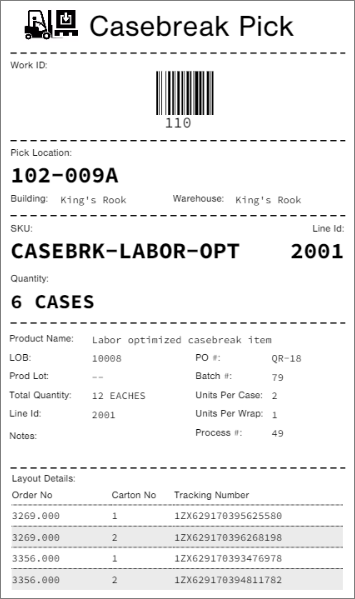
Here is an example of a work ticket:
Generate Work Tickets
- Access the “Work” table. Two ways:
From the Dashboard: Click the “Warehouse Operations” tab, click the “Work Management” App, then click the “Work” Table.
From the Quick Actions shortcut: Press a dot (period) on your keyboard, then select “Work” from the list of Quick Actions. - Click the checkbox next to each work record for which you want to create work tickets.
NOTE: Location Move work records display as two records (one for “pick” and one for “put away”), but there is only one work ticket for the move. You can select either record to print the work ticket. - Click the Actions button and select Work Ticket.
- Click the Download Report button to download a PDF of each work ticket.
- Click Done.