You can add any EDI Document to your EDI connection in Infoplus. Learn the steps for setting up a new EDI document type.
Supporting Additional EDI Document Types
Although Infoplus supports a wide variety of EDI document types, you may find that you need to accept or transmit document types that Infoplus doesn't natively support. For these situations, you can use Infoplus Scripts to build custom document mappings, as explained here
Adding a New Outbound Document Type
In this example, we will add support for an 846 (Inventory Advice) document to be sent from Infoplus to an EDI partner. This is not a document that Infoplus has built-in support for, but it can still be generated by Infoplus, following this guide.
1. Request the new type from Infoplus Support
To begin, you'll need to speak to the Infoplus support team, to get the new Document Type added to your Infoplus site. To do this, all you'll need to do is submit a support ticket identifying the document number you want to add (for this example, 846).
2. Create the Script that will populate your EDI Documents
Once the new document type has been set up, you can go to the Script table in Infoplus, and create a new Script, with the following attributes:
- Name: Ultimately up to you, but we recommend: using the format of, for example: 846 Document Generator
- Script Type: Record. Even though you're producing an EDI document, do not choose the type EDI -- that type is used for customizing inbound EDI documents.
- Record Type: You'll need to choose a record type that corresponds to how you want to trigger this document. For example, if your document deals with an individual order, choose Orders here. If your document applies across a set of records (such as our 846 example here), you'll want to choose a record such as Warehouse.
- API Version: You'll need to choose a version later than 2.0. We recommend using the latest version number available, and if you need access to a feature not in another version, you can choose beta.
Then, the code for the script must be written. Here's a full example to generate an 846, with lots of comments to explain what each piece is doing:
3. Add the new Document Type to your EDI Connection
Go to the EDI Connection record for the partner that you want to receive this document. Hit Edit, then in the Document Types section, hit Add, choose your new document type (but note, you do not need to select your script - again, this would only apply to inbound documents). Save the EDI Connection.
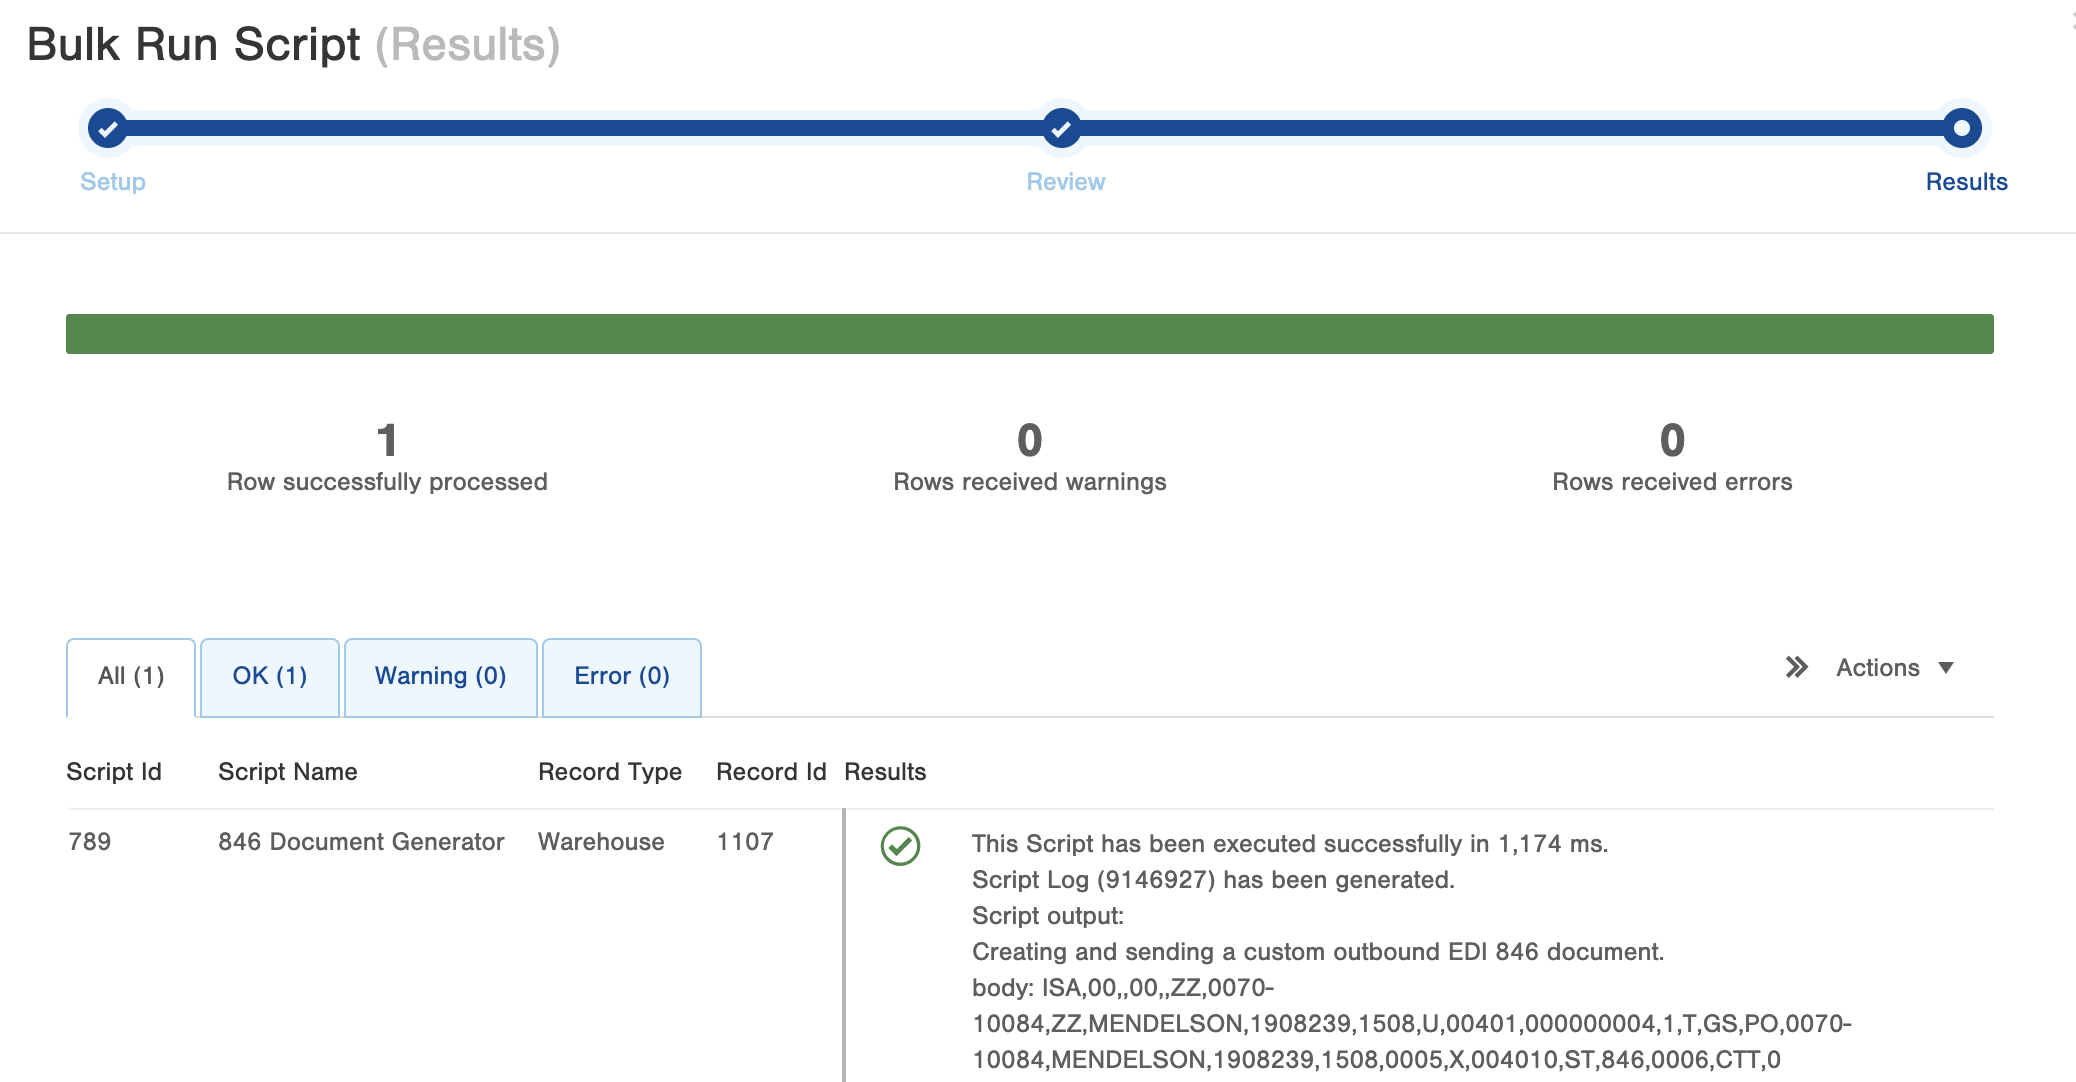
4. Do a manual test run of the Script
Go to the table you choose above as the script's Record Type (Warehouse in this example). Click on a row in the table, then use Actions -> Run Script. Choose the script you created above and click through the process to run the script. You should see a success screen that looks like the following:
You can then go to the EDI Document table to find the document your script has created, to review its content (once it moves out of Pending status).
5. Setup Automation
Depending on your use case, you may need to create a Trigger or Scheduled Script Plan to automate the running of your script and the creating and sending of your document.
